DAILY INSPIRATION.
/


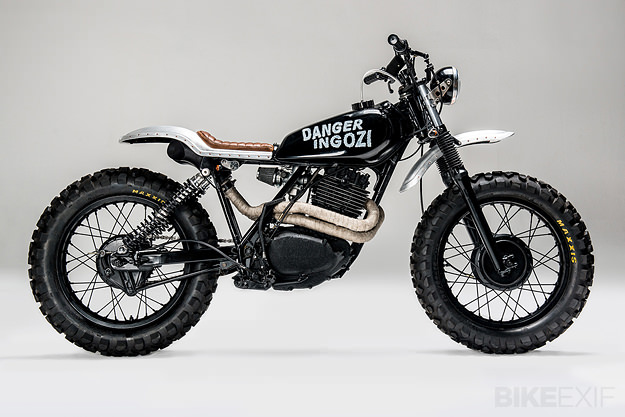
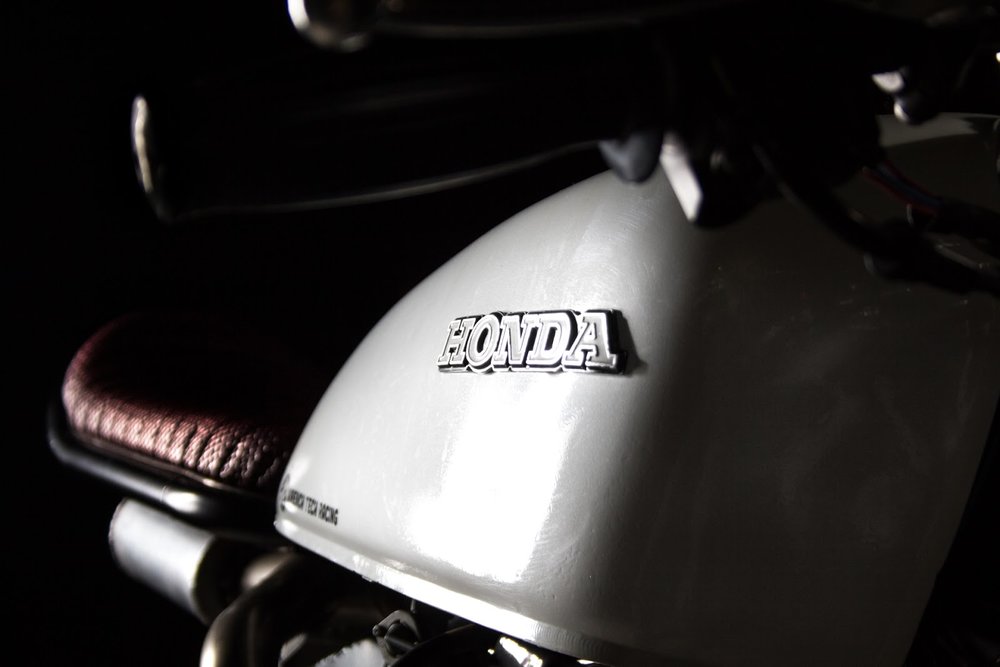
Every once in a while I get e-mails from people who have been inspired by the CX500 I built to pick up their own. I think most of us have that one influence in our lives that sparked us to get on two wheels so it's always a great feeling to be that influence to someone else. A guy named Alex from Berlin sent me one of those e-mails back in early May. I congratulated him, passed on a few learnings I've had acquired over the years of ownership and wished him good luck with the build. Well I just received another e-mail from Alex exclaiming that he's finished his bike. This 1979 CX500 is the first bike he's dabbled with. It borrows much of it's visuals from the CX500 I built but what's interesting to me is where it differs. I always try to encourage people to put their own touches into their machines. Imitation is flattering but in the end you'll feel much more accomplished in knowing that the bike is original to you and your vision. Alex's chosen points of differentiation are very well done and his execution is up there with what I've seen from well seasoned wrenchers. Alex is now hooked and already has his eye on the next build, a Moto-Guzzi LeMans III for a friend of his. I'm excited to see where it goes!
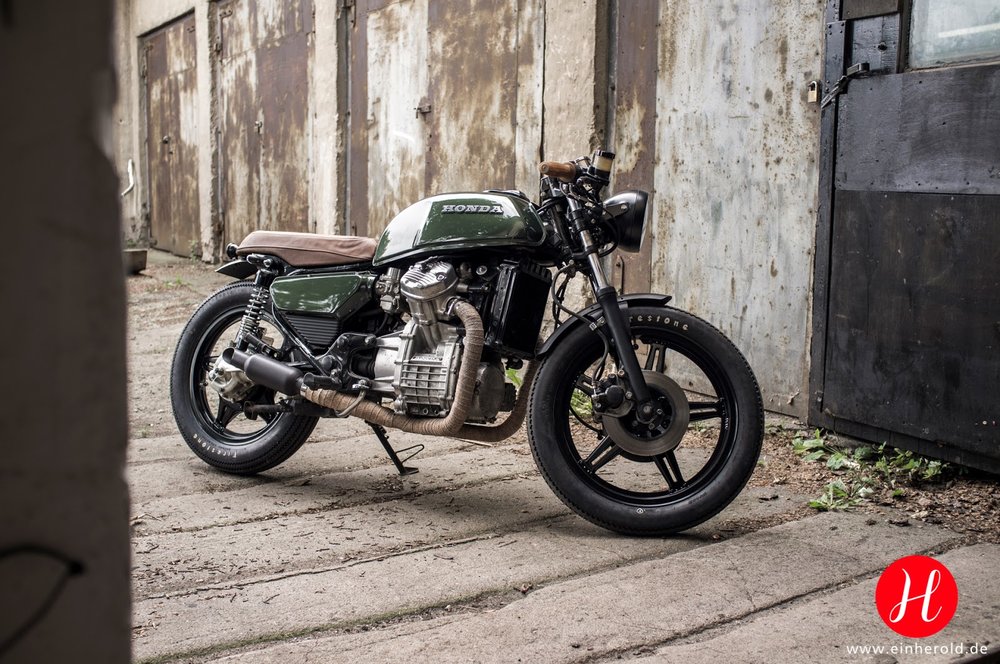

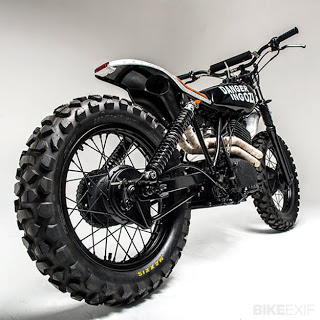
"Because of German laws for vehicles I needed to put blinkers and a speedo on the bike.I've chosen simple mini blinkers and a 60mm retro speedo with all LED control lights.Head and Taillight also needed to be certified. The headlight is a new H4 reflector in an old fully matte black housing and the taillight is a modern 9 LED tail and brake light in classic bates design. My Tires of choice are the Firestone Champion Deluxe. I shaped the fenders to be more in line with the tires. The front fender is the original CX fender. I just removed the round edge and shortened it on both sides to have it in line with the disc brakes and headlight in front and the lower edge of the water cooler in rear. It's a pity that we can't have this open look of the wheel here in Europe."
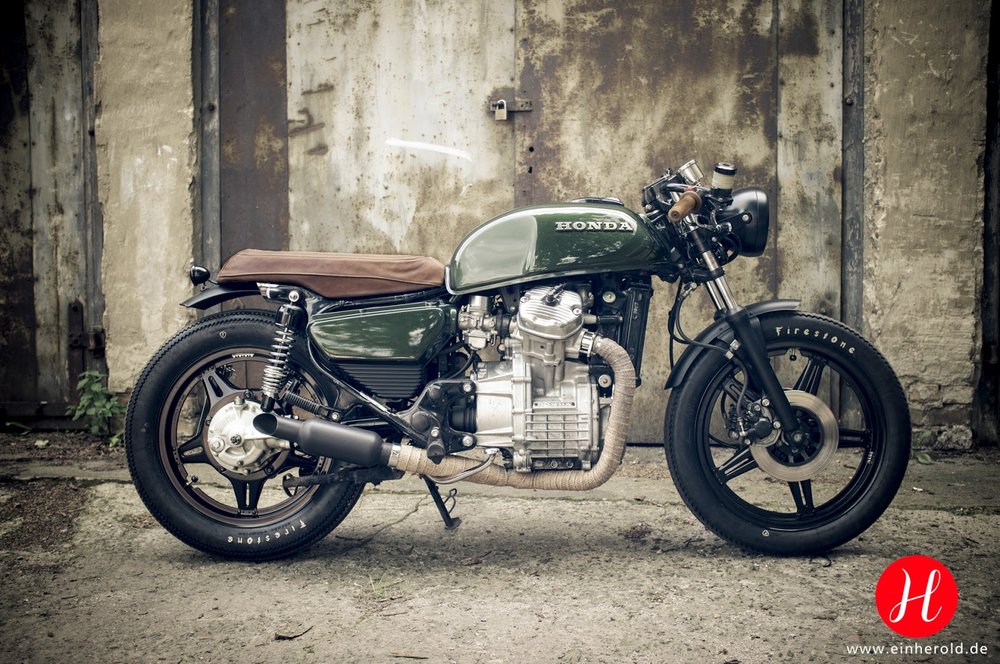
"The rear fender is a universal fender I found online in nearly the same shape like the front one. I decided to make a higher seat and in brown to match the grips. For the stitching I worked together with Berlin fashion designer Karen Jessen from Benu Berlin who then made the leatherwork. I found a local shop who can laser all materials and they lasered my logo into the rear leather piece of the seat. For the stitching we've chosen sewing cotton in the same color like the exhaust wrap. I made a much shorter and a little curved and open ending for the exhaust out of an old exhaust pipe from my car. The fuel cap and fuse box I kept in black. My color of choice is a 1977 Porsche paint called Oak Green Metallic. I think to keep the side panels is important for the line of the bike so I kept them but decided to paint the lower parts in matte black to make them visually smaller. The green is so bright and it was just to much in full green. I've done nothing to the frame to keep the used and naturally aged look of it in contrast to the highly polished new metallic paint. Another regulation in germany is about the size of the numberplate. It must be lightened so I made a bracket on the left side of the rear wheel. We need to have a rear view mirror on the left side so I kept the standard CX mirror."

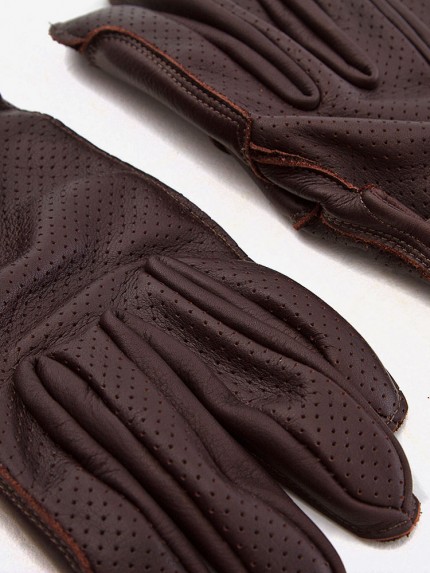
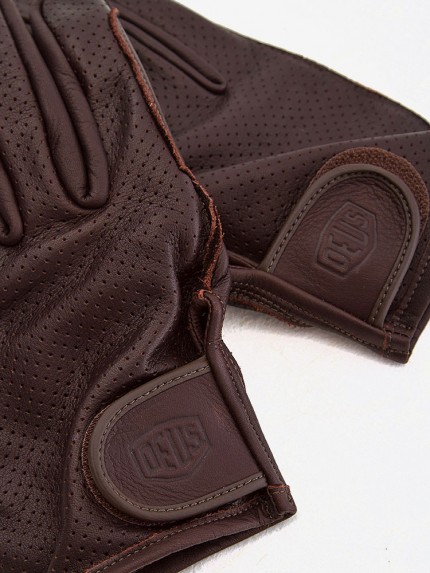
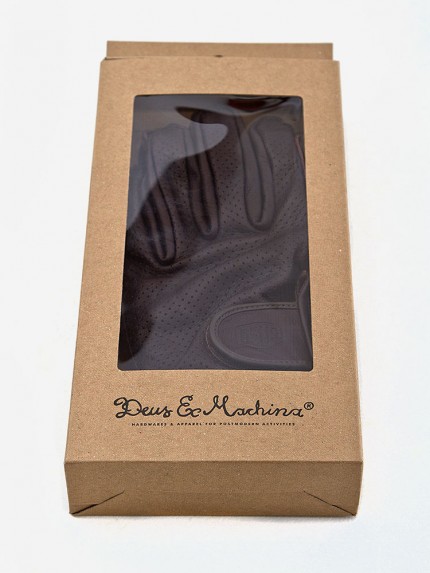
"There is no doubting the quality, premium materials and attention to detail that kept us coming back to Harold's Gear. A staple for any rider, the gloves have been part of our go-to gear for as long as we can remember.The unfortunate discontinuation of Harold's Gear gloves marks both the end of an era and a new beginning to the tradition of quality Japanese riding gear.We are honoured to announce our continuation of the Harold's Gear legacy, working directly with the Japan factory to re-release three of the Harold's Gear favourites under the Deus marque.Re-introducing the Gripping, Perforated Driver and Belted gloves. All three styles offered in two colours, handcrafted in Japan from 100% Napa cowhide leather."
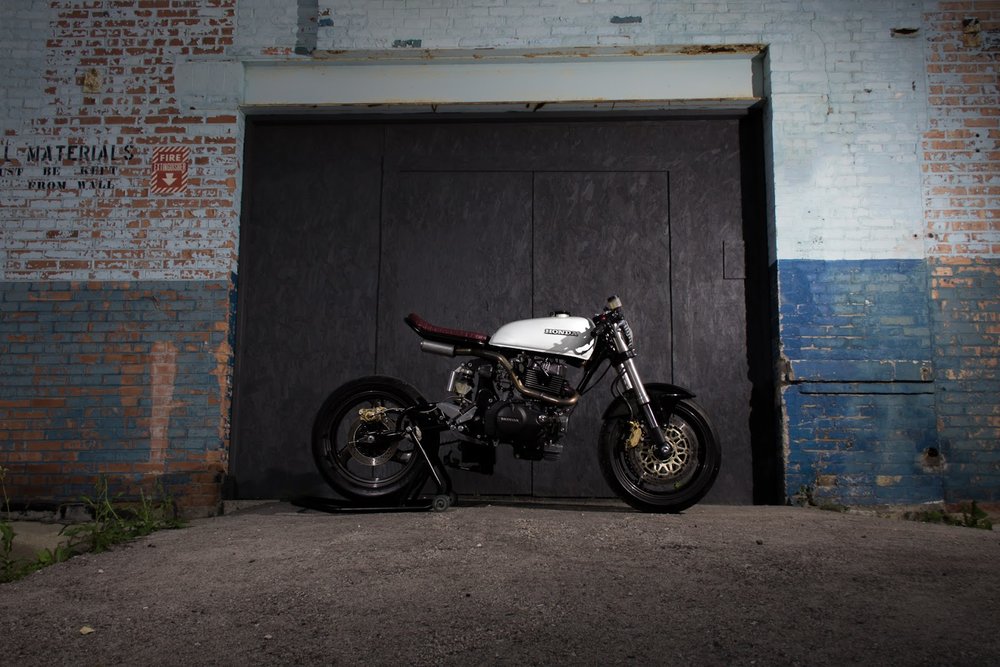
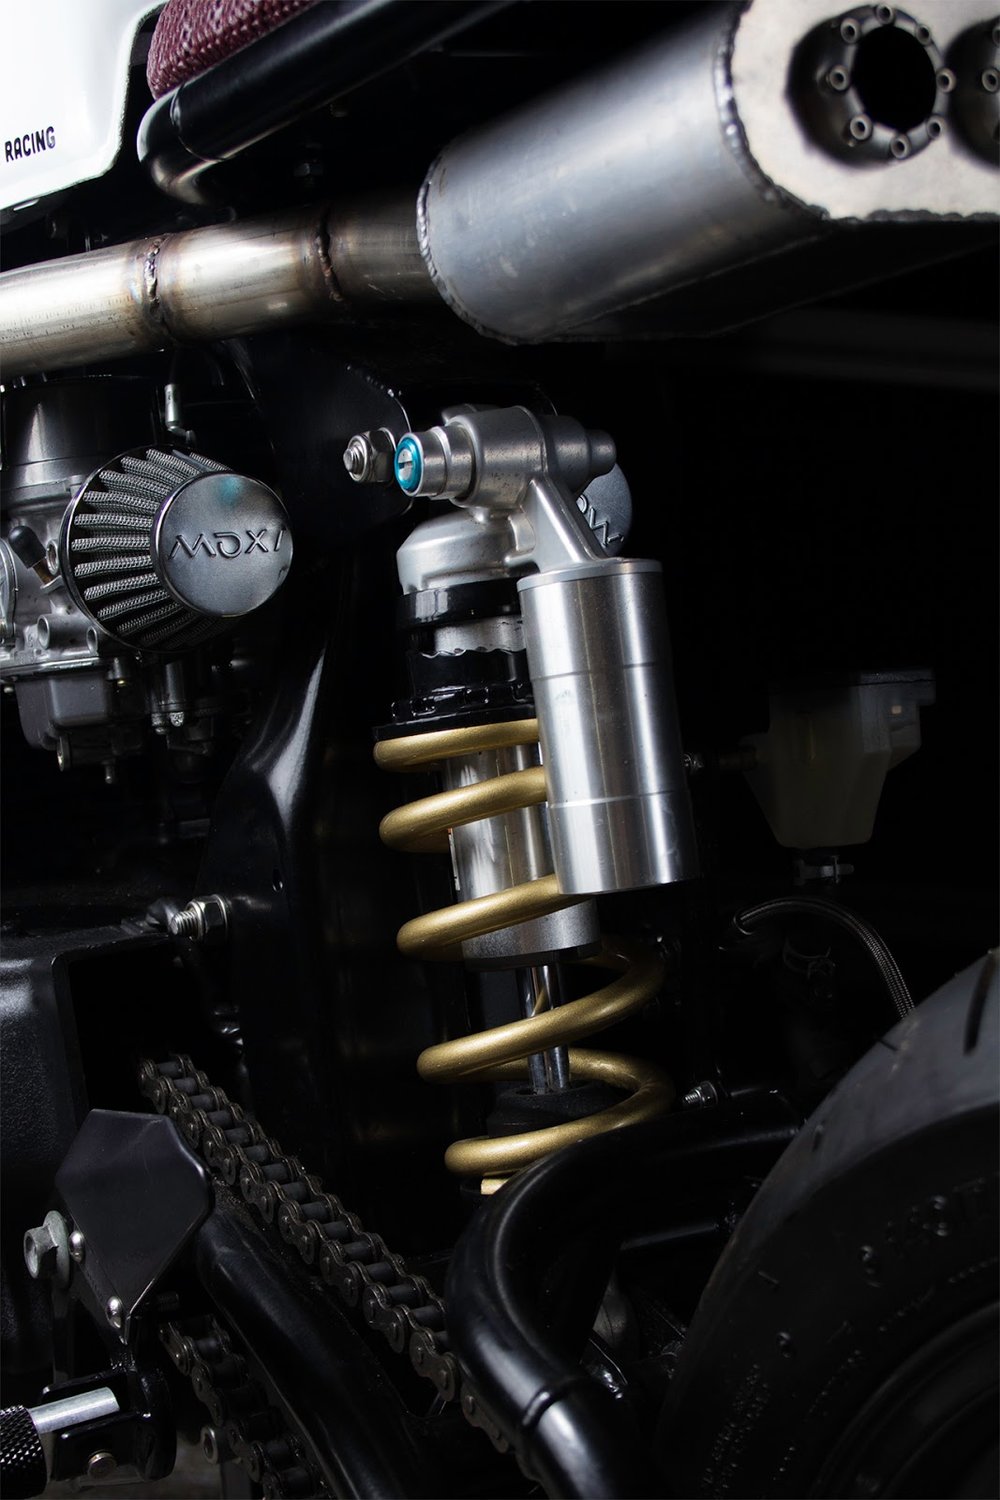
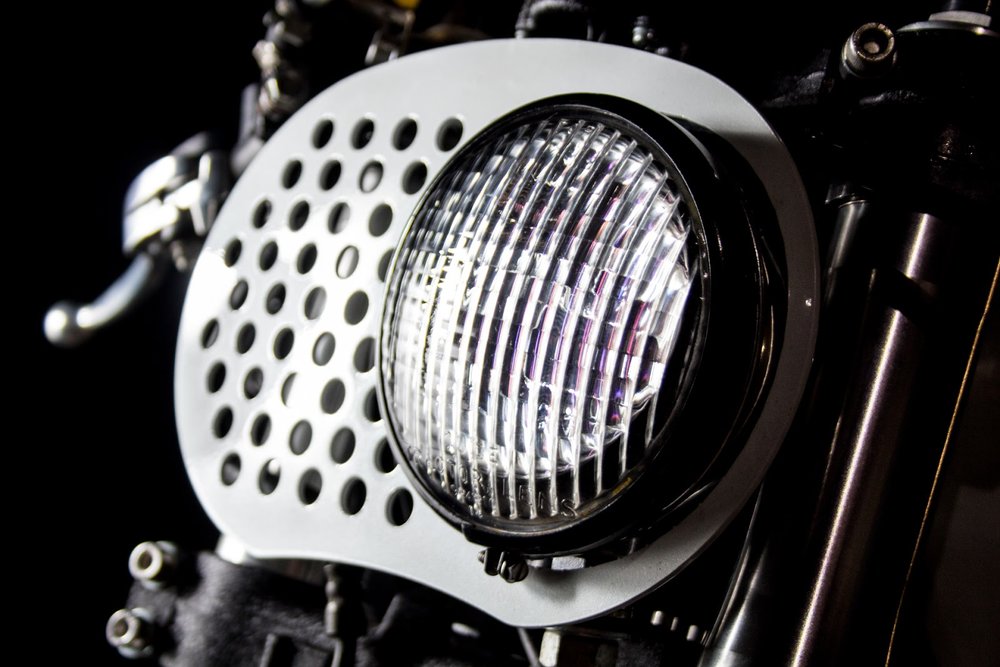
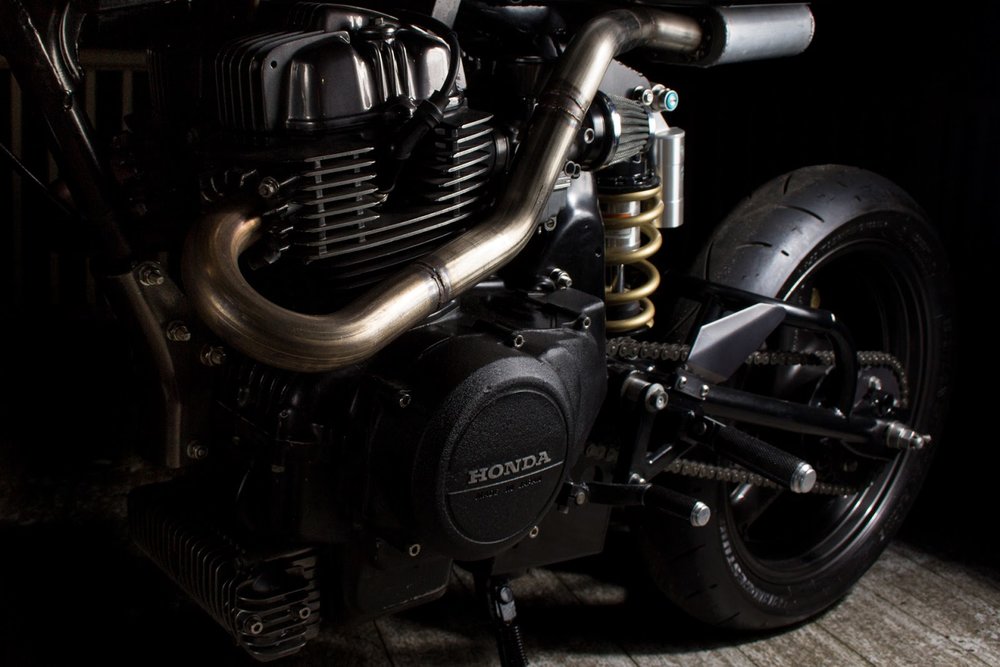
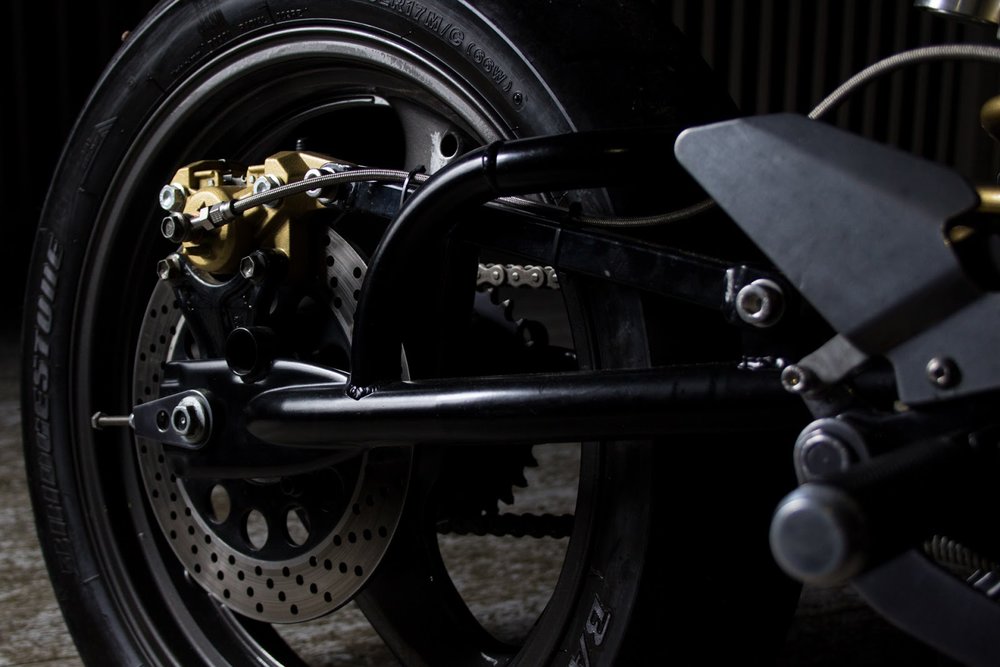
I had the pleasure of meeting these guys and their show stealing CM450 at this year's Chicago Mods vs. Rockers event. It pleased me even more to find out they're also located here in the city. The Wrench Tech duo walked away with the Best Modern Japanese award, which may have been due to the amount of upgraded parts borrowed from modern day sport bikes. This bike is mean, outfitted, and stunningly well proportioned. It was hands down my favorite bike at the show and I can't wait to see more rolling out of this shop.


I do my best to respond to everyone, but please read the following FAQ before firing off an e-mail.
1. Spend the money on a good repair manual (not a Haynes). Clymers and manufacturer manuals are the best.
2. Follow torque specifications in the repair manual you just bought. You'd be surprised how loosely some bolts need to be torqued. Over tightening leads to a world of immediate and future headaches.
3. Buy a common bike. If you're just starting out you don't need the added headache of not being able to find parts and having no one to talk to about it... which brings me to
4. Join a forum for your bike. The biggest one you can find. You're likely into vintage bikes which means there are guys out there who have been working on your bike since it rolled off the lot 40 years ago. They've acquired more knowledge then you can fathom and are usually willing to share it. Use them. They are a resource.
5. Never modify anything without fully understanding how it functions and, most importantly, it's relationship with everything it comes in contact with. The more you mechanically understand the more you can modify.
6. Likely the most important lesson - Use the right tool. These machines were engineered to be put together and to come apart in specific ways. Figure out how via your manual, parts diagrams or through the forum before trying to force something.

Custom Motorcycles & Design, Portland OR.

portland customs tee - $19.95