Husqy570 Shakedown at White Sands
/On our way back from the Handbuilt Show in Austin we took some time to unload the Husqvarna for a few laps around the White Sands National Monument in New Mexico.
Photos: Jenny Linquist


On our way back from the Handbuilt Show in Austin we took some time to unload the Husqvarna for a few laps around the White Sands National Monument in New Mexico.
Photos: Jenny Linquist
The Husqy570 build is featured in Iron & Air issue 27.
Photos by Jenny Linquist


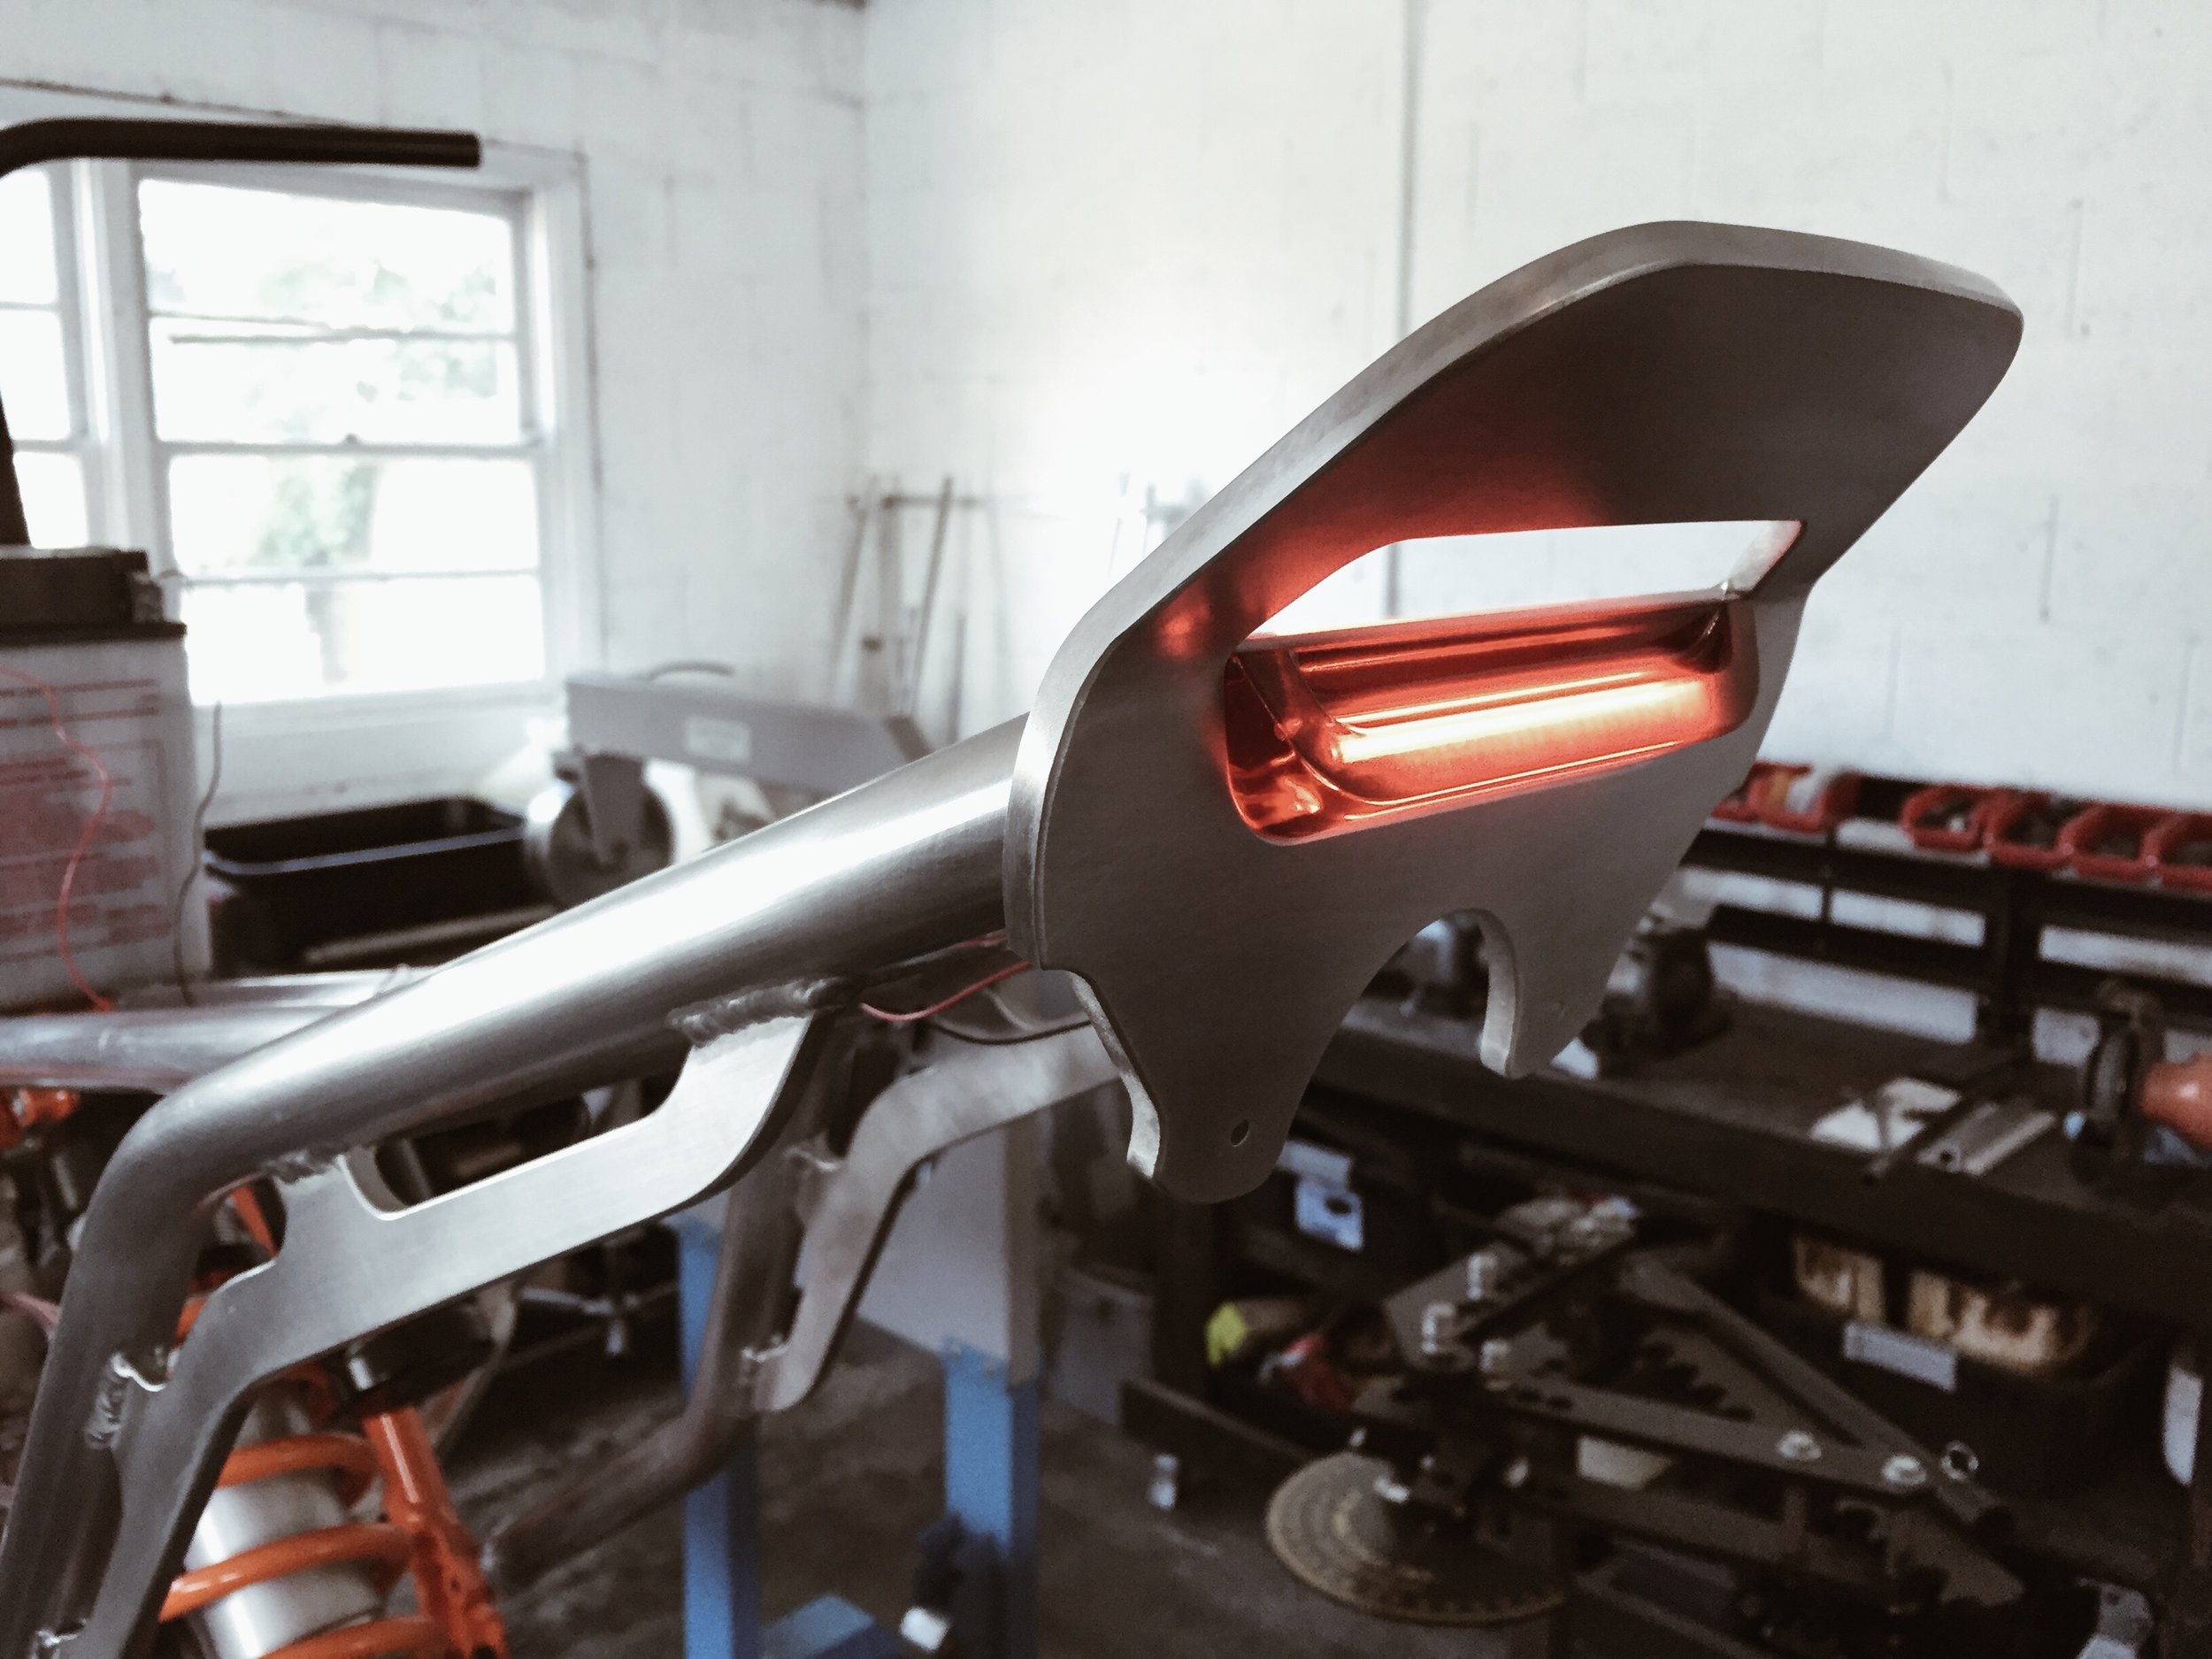
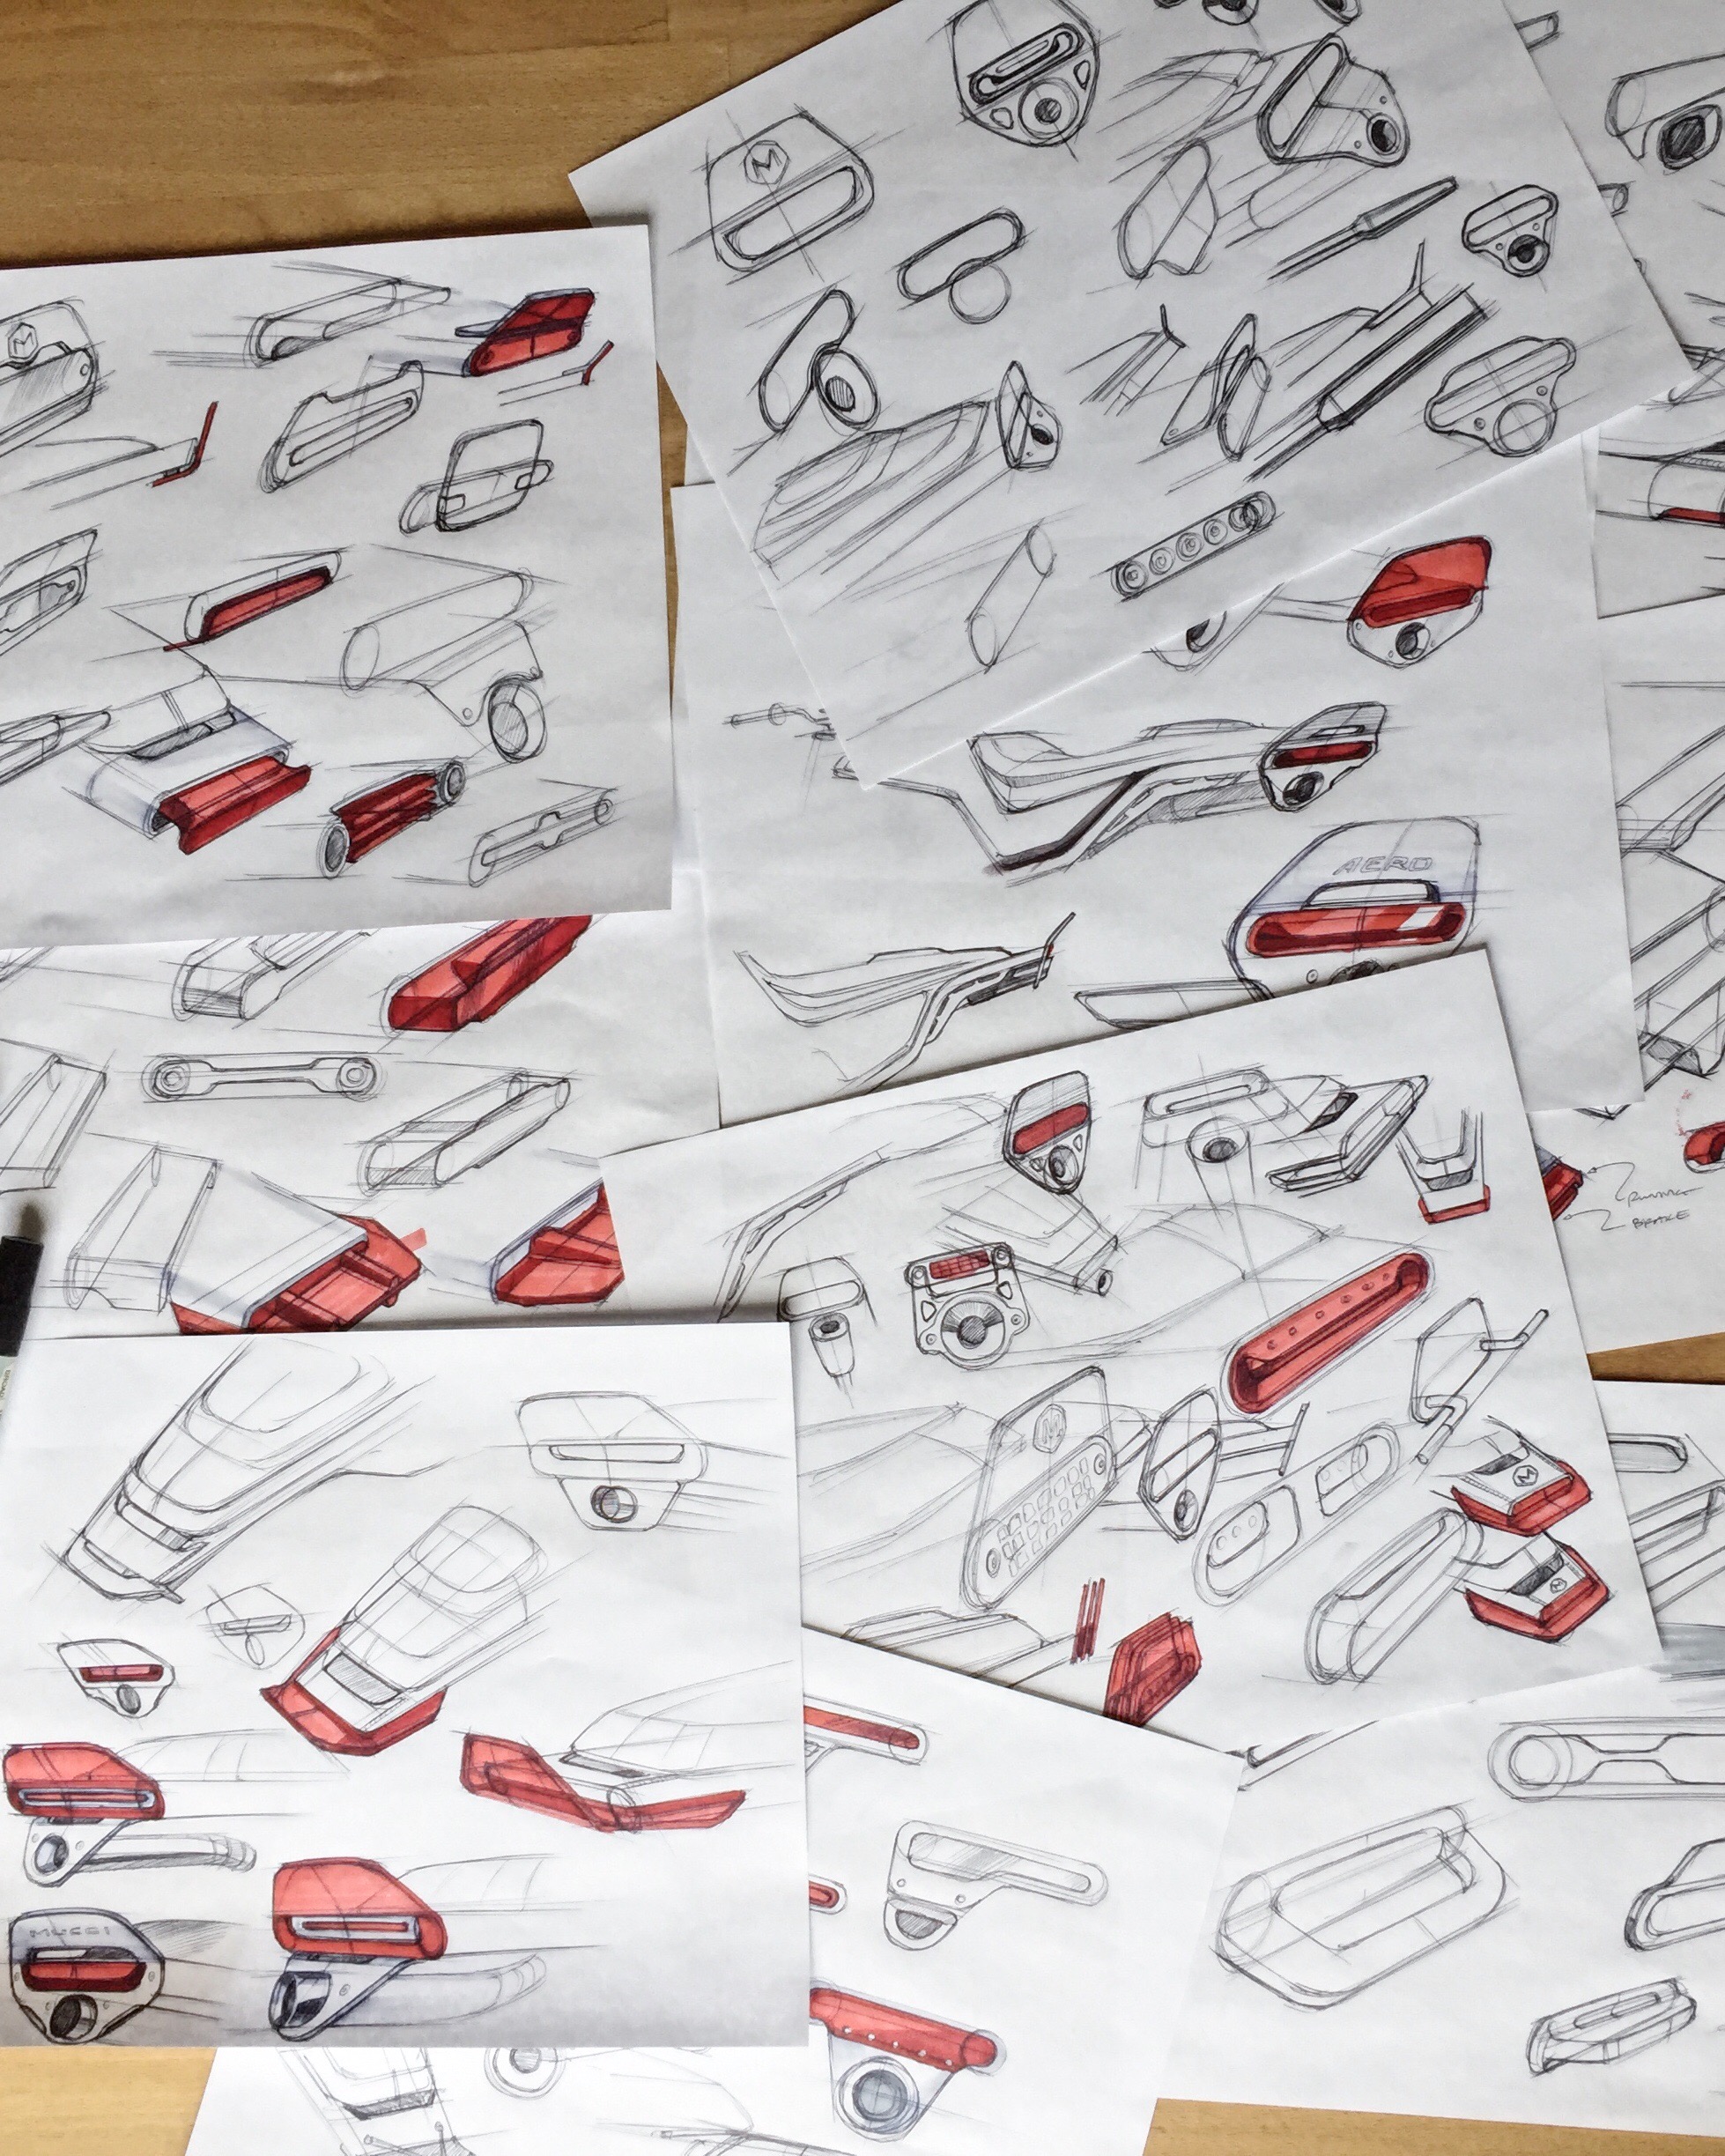
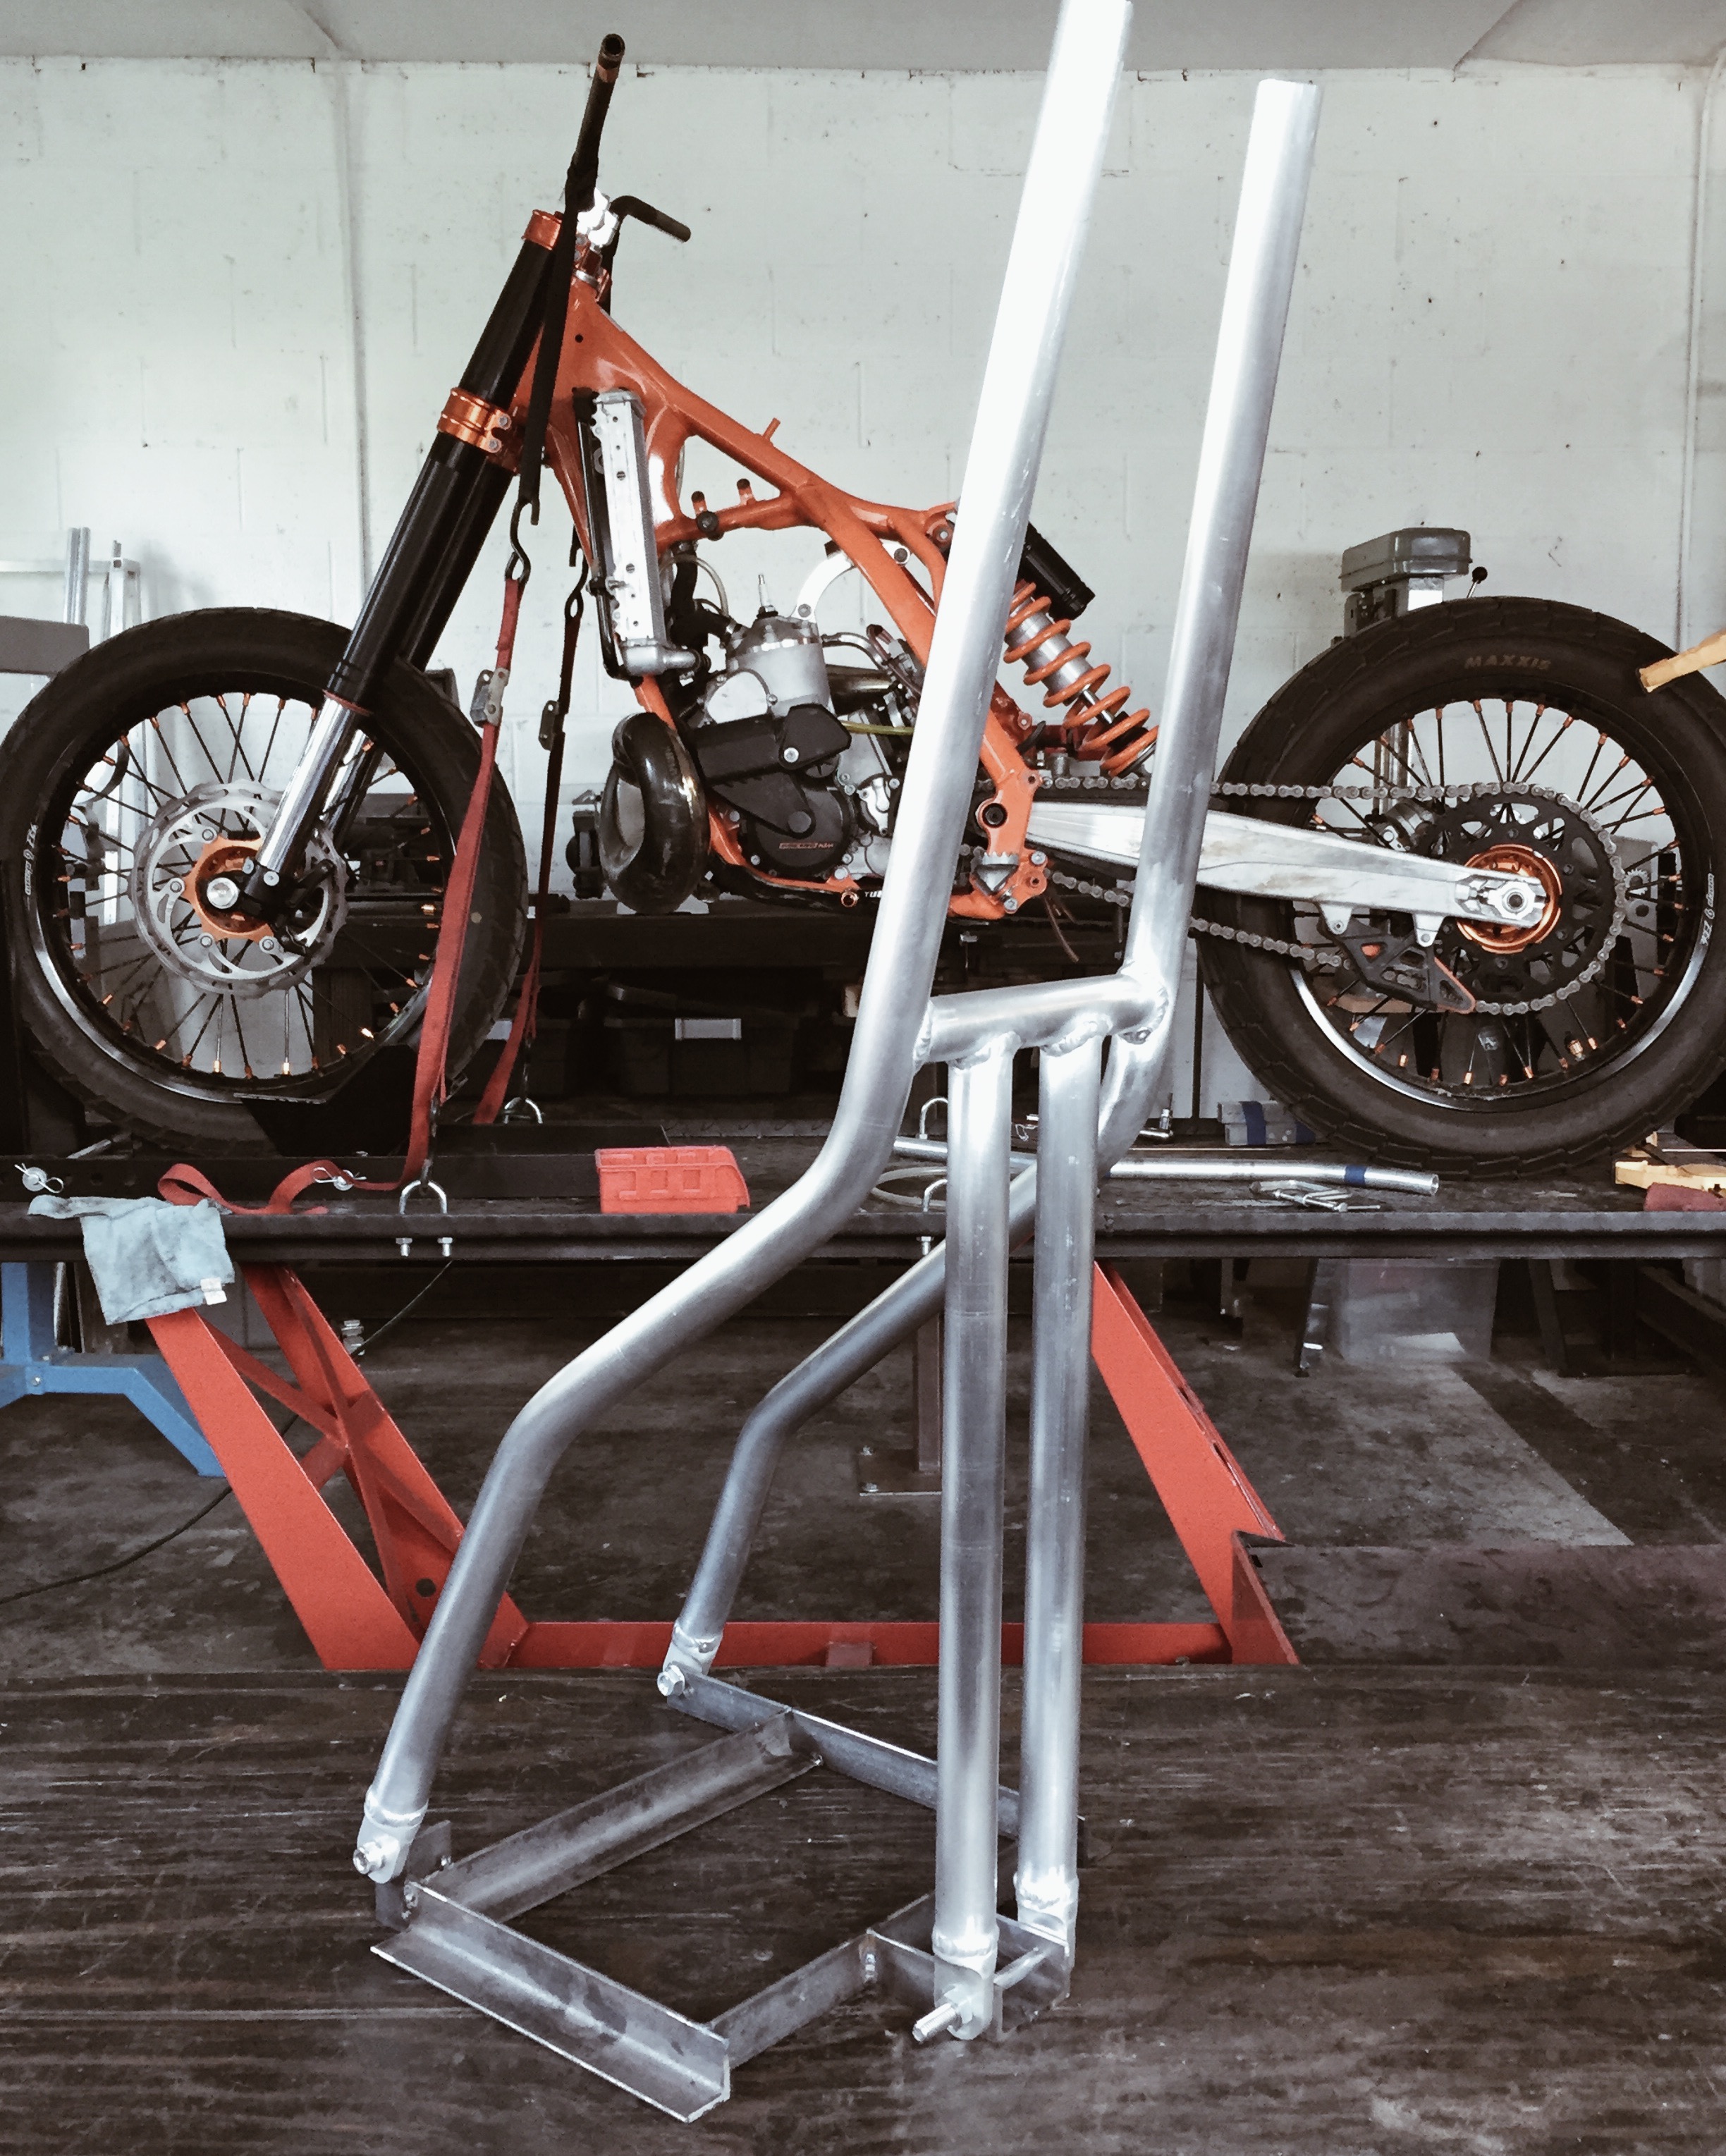
I went back and forth a lot on the radiator mount design for the 570. The bike is a blend between modern and vintage so coming to a design that fit the rest of the aesthetic was difficult. As much as I wanted to do some 80's inspired fiberglass fairing work, in the end it just made the front end look too bulky. The radiator is a big piece as it is so the mount and guard had to be as light and minimal as possible while still offering protection.
I quickly mocked up all the mounting points and surrounding parts in CAD to get a better idea of the design in 3D before going forward. Here's what I came up with digitally.


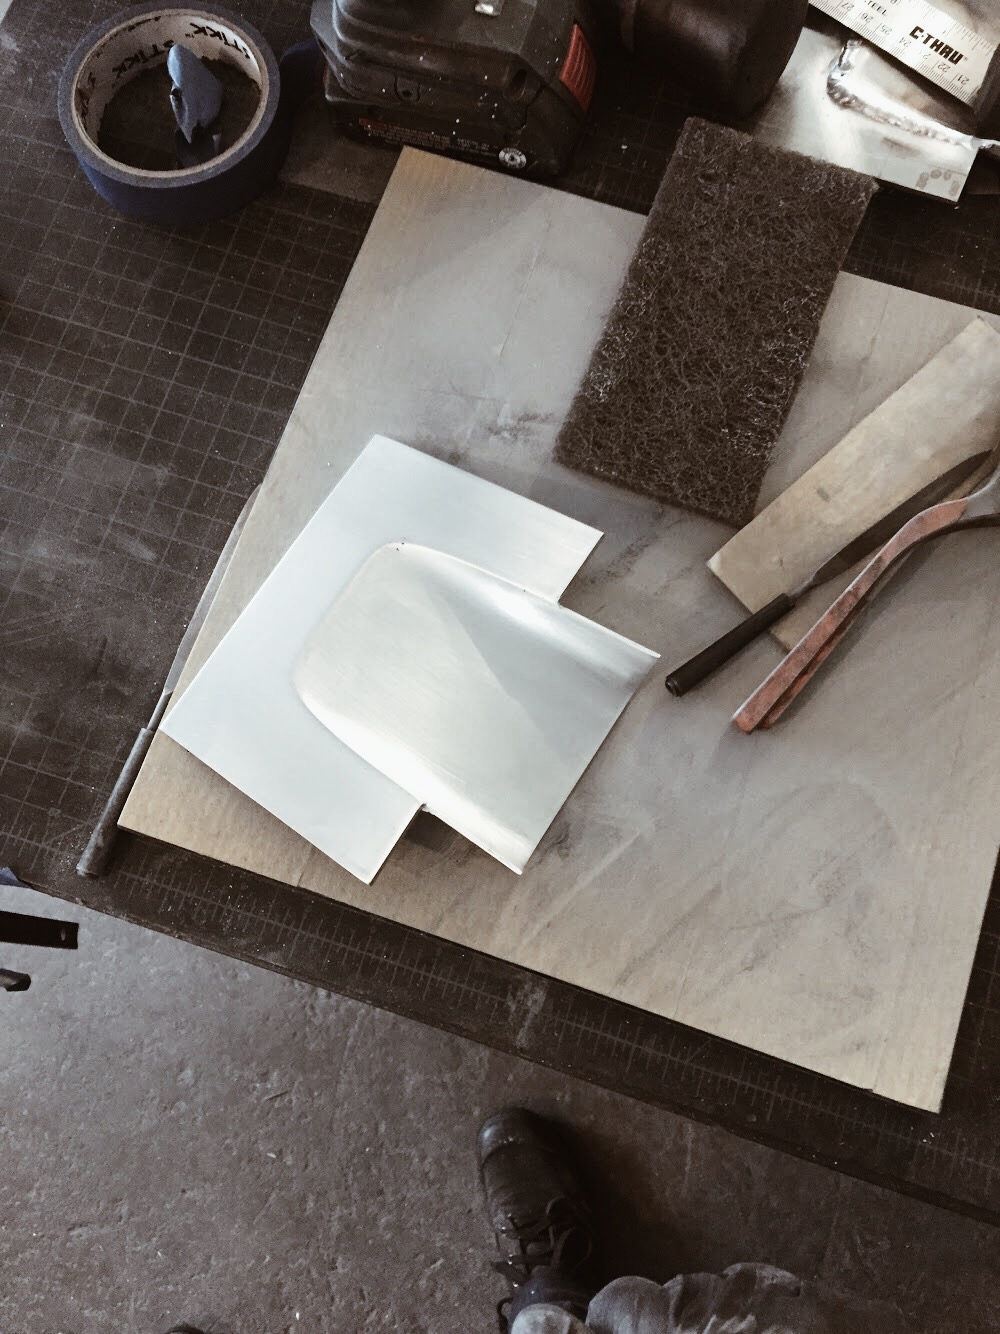
I sent the die lines of the center guard and mounting brackets over to get water jet out of 11G stainless then began bending up the perimeter piece. I used 1/2" solid T304 round bar in a manual bar bender.


I went through a decent amount of bends before getting to the point above where everything lined up. Downside was it was a lot of sections that would need to be welded up and filed smooth. After the 3rd attempt I knew the tolerance of the bender well enough to do it all out of one main piece and a small connecting piece. Two welds, much easier than 4.


Welded up and filed smooth.

The last bend took some custom jigging to get right. A little MAP gas and some leverage ...

and she fits.


Welded in the rear brackets and painted them along with Mishimoto radiator. Polished the round bar and glass blasted the center section. Here it is at the One Moto Show.

Photo by

Photo by
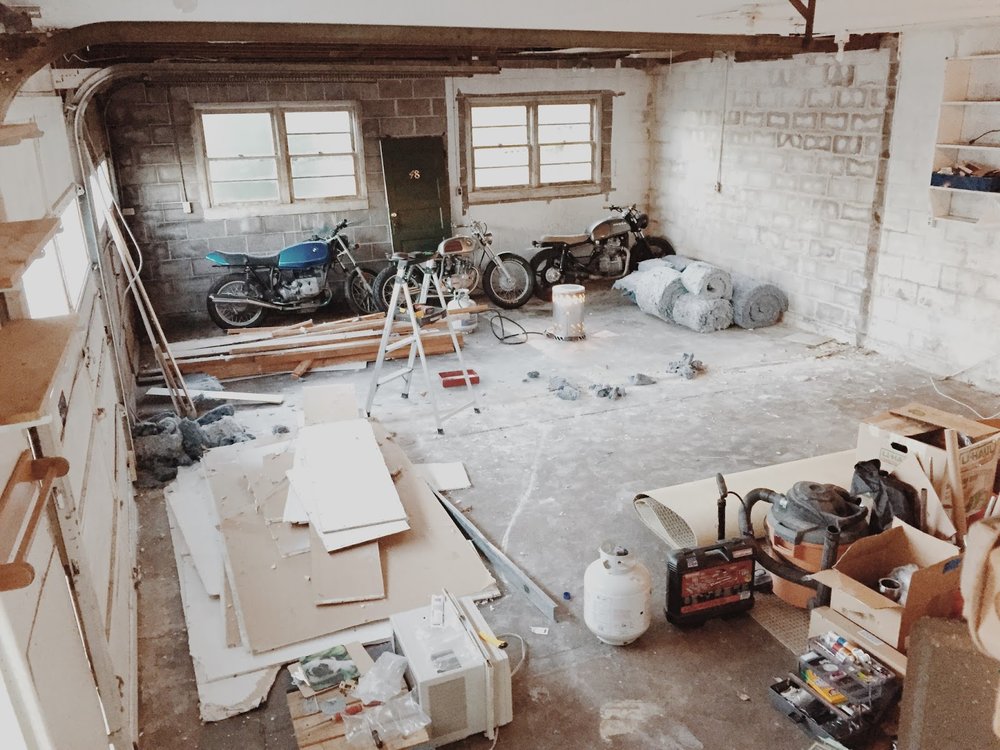
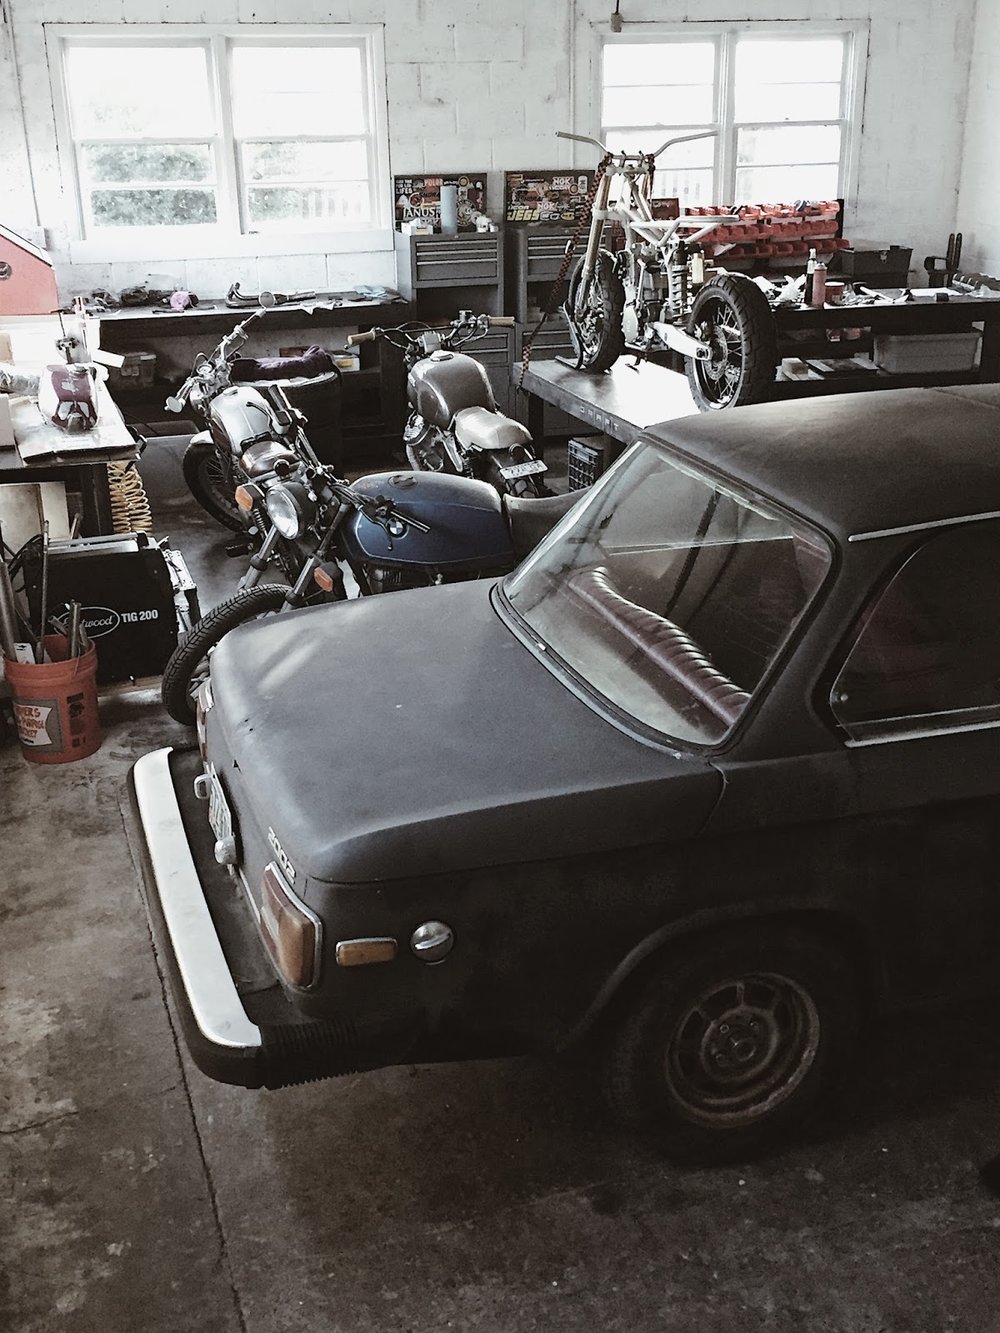
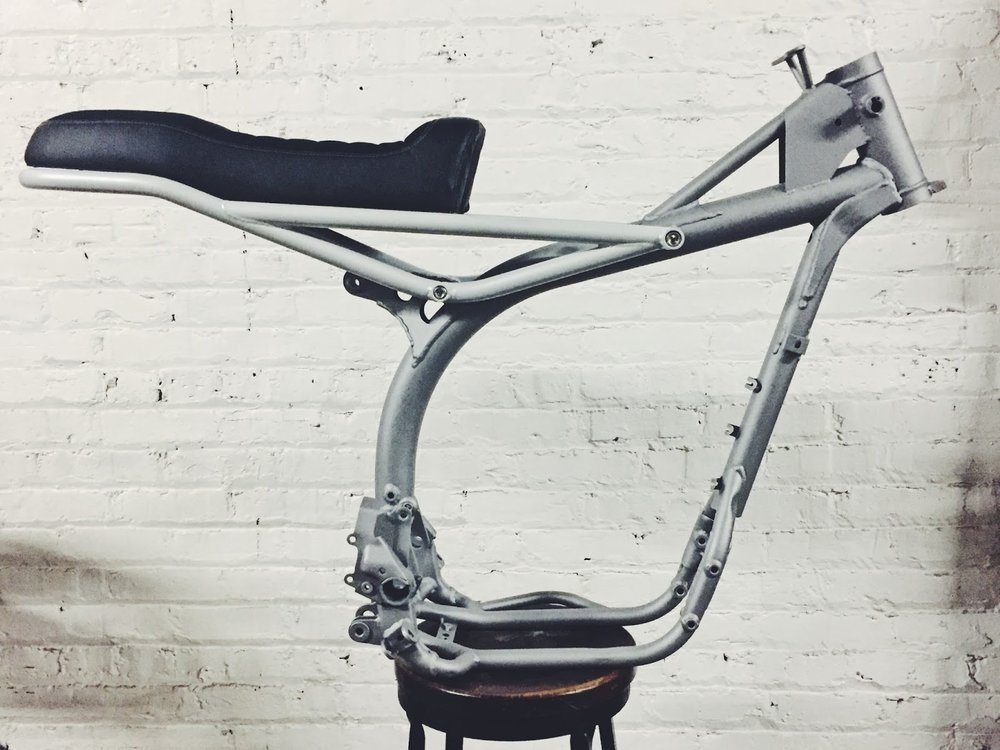
Finally got the Chicago shop all packed up and moved to Portland. The new space is 700 sqft with a lot of potential but needed some work to get there. A wall was dividing the 3 bays 2:1. I knocked the center wall down to open it up and let the light in from the bank of windows in the single stall. We then drywalled the ceiling in, ran more electrical lines and white washed everything.
We're going to work at adding more decor and a hangout space in the future but for now it's in do-shit mode. The One Moto Show is in 8 days and this Husqy needs to git done.


A quick update on the Husqy build status:
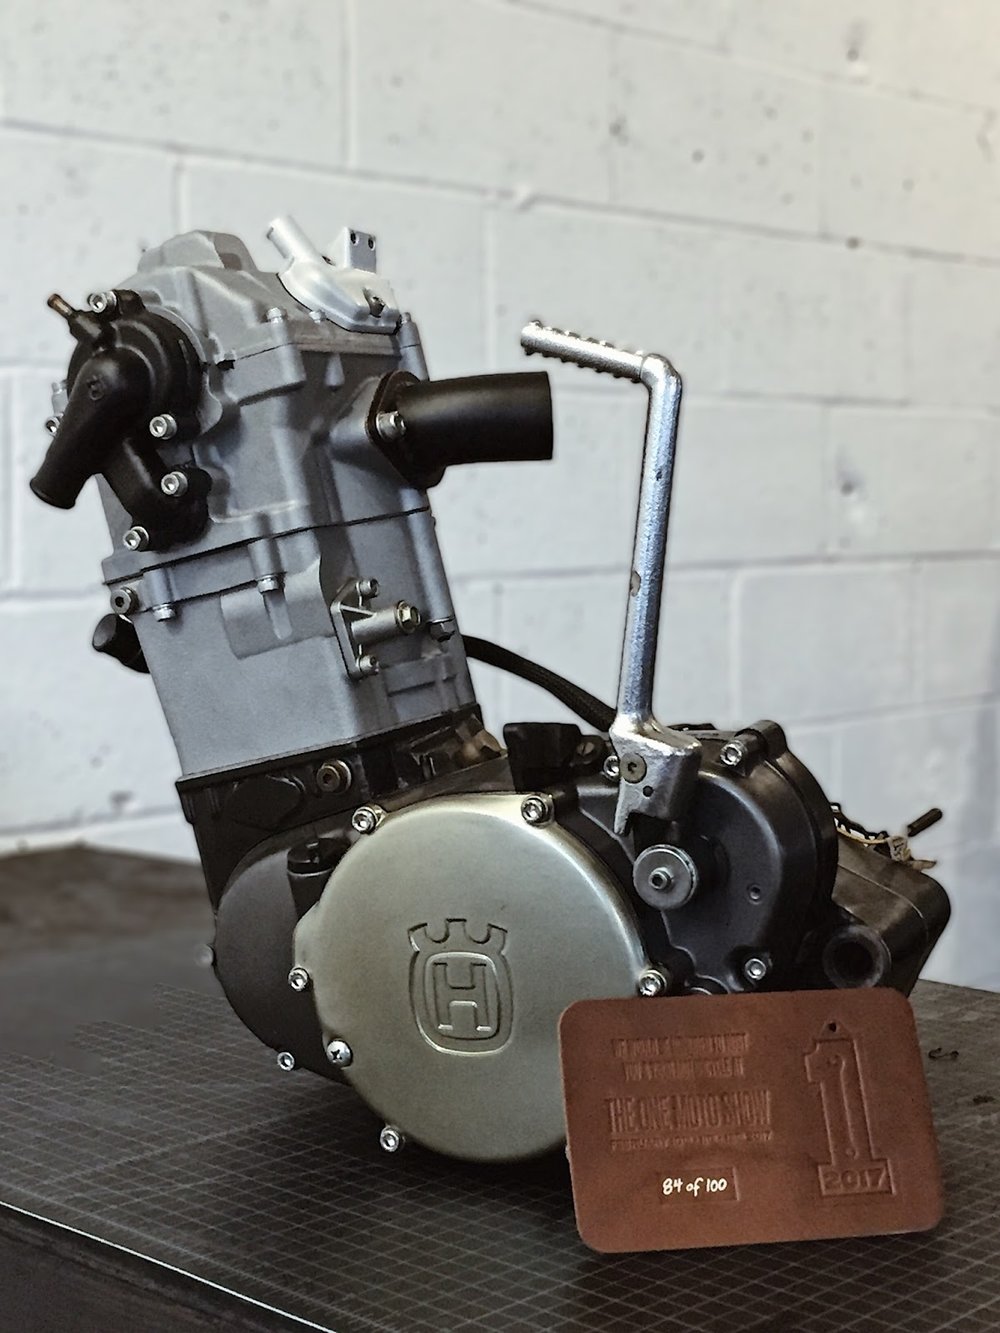
Motor disassembly to install the new clutch basket, valves, rings, and send the covers and upper cylinder out for powder coating.
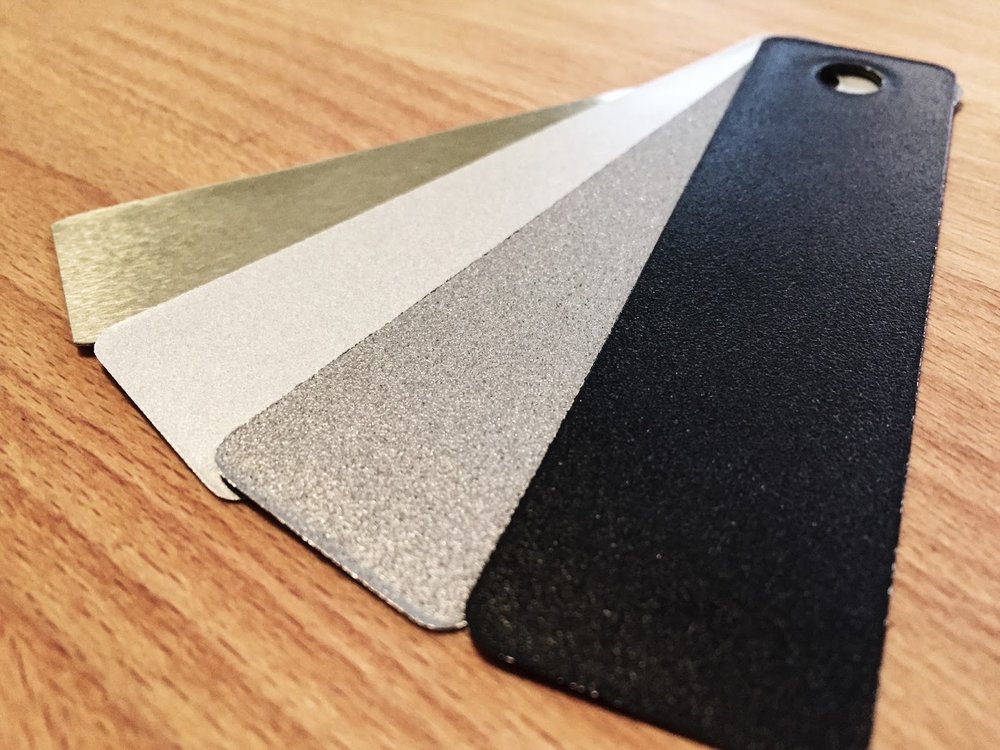
Color swatches from Prismatic Powders.
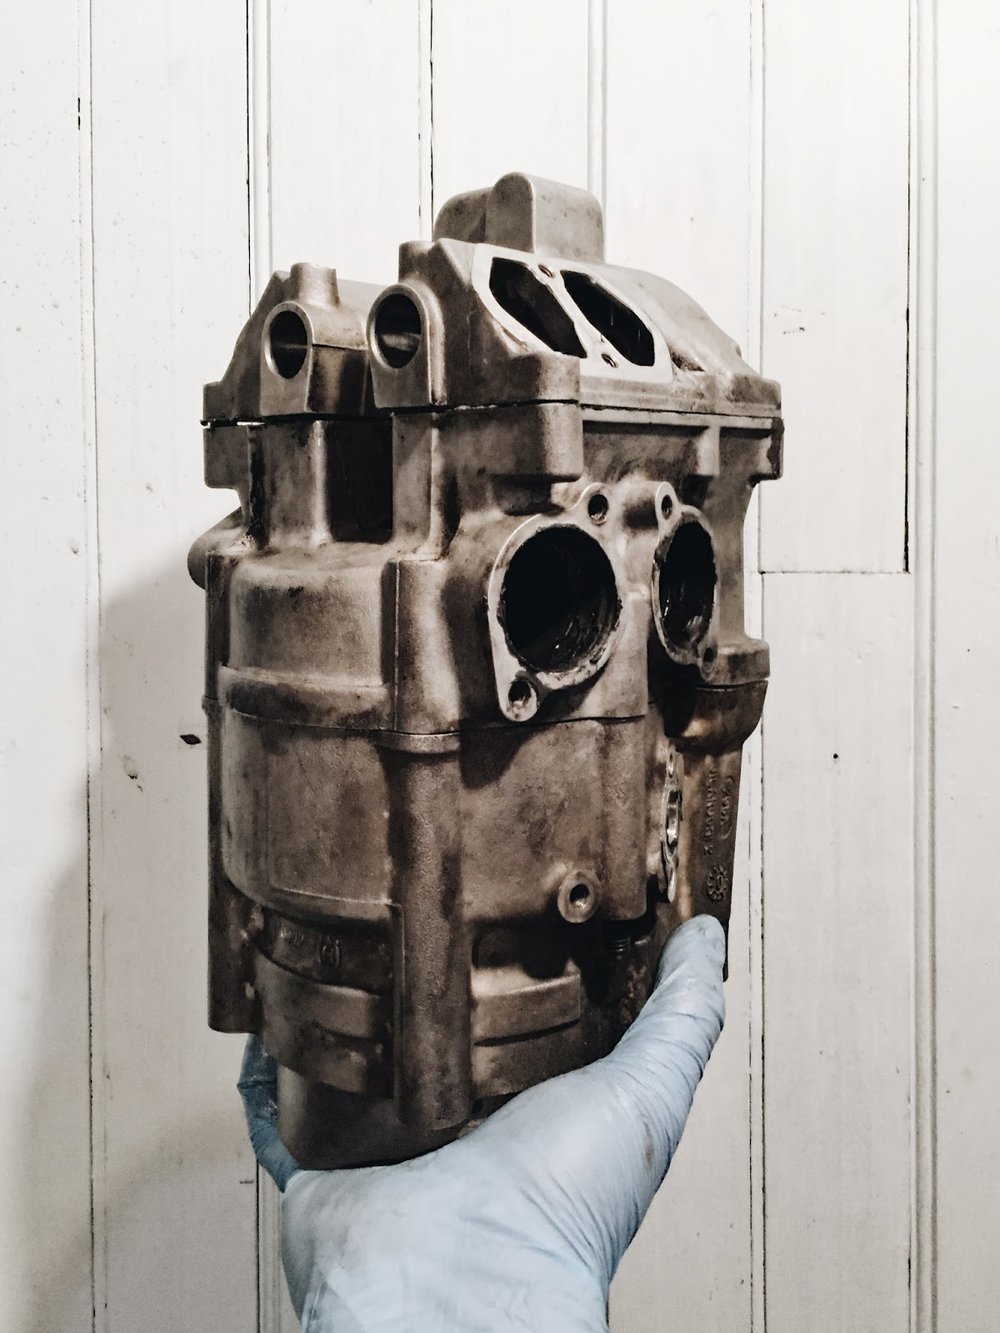
The heart, extracted.
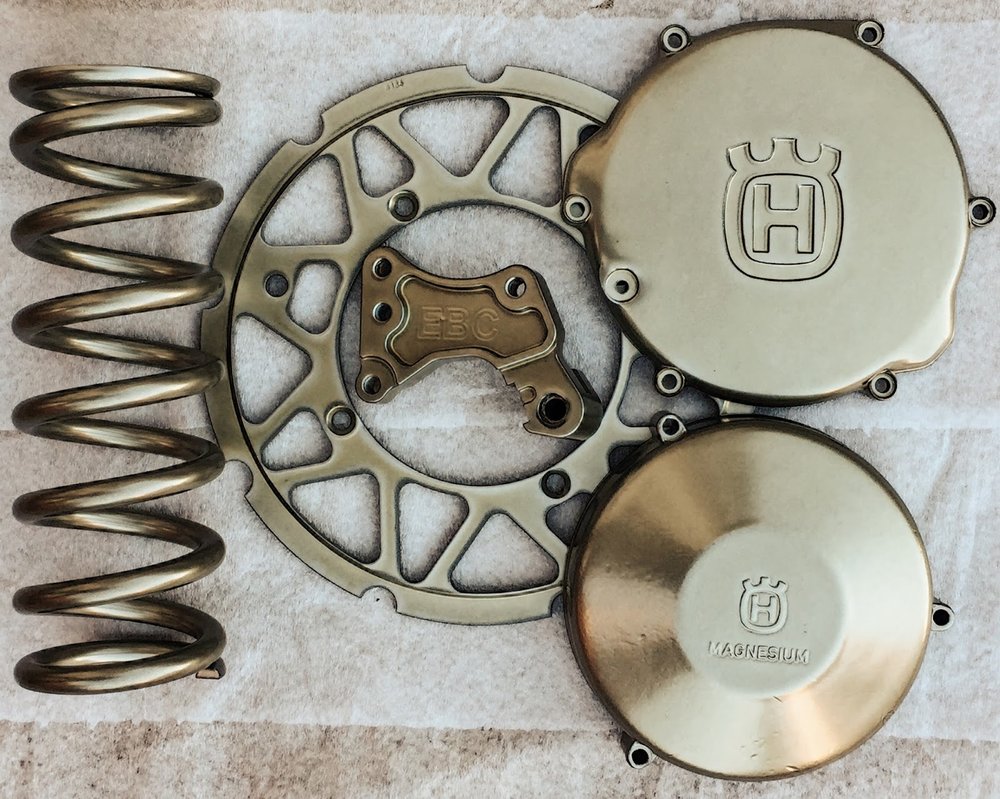
Parts are back from powder and reassembly has begun.
Unfortunately I ran out of time. It's the 30th and our move has come. The Husqy went into various boxes and ziplock bags, destined for it's new PNW home. We're happy to get out of here before the snow hits. The new shop space awaits...
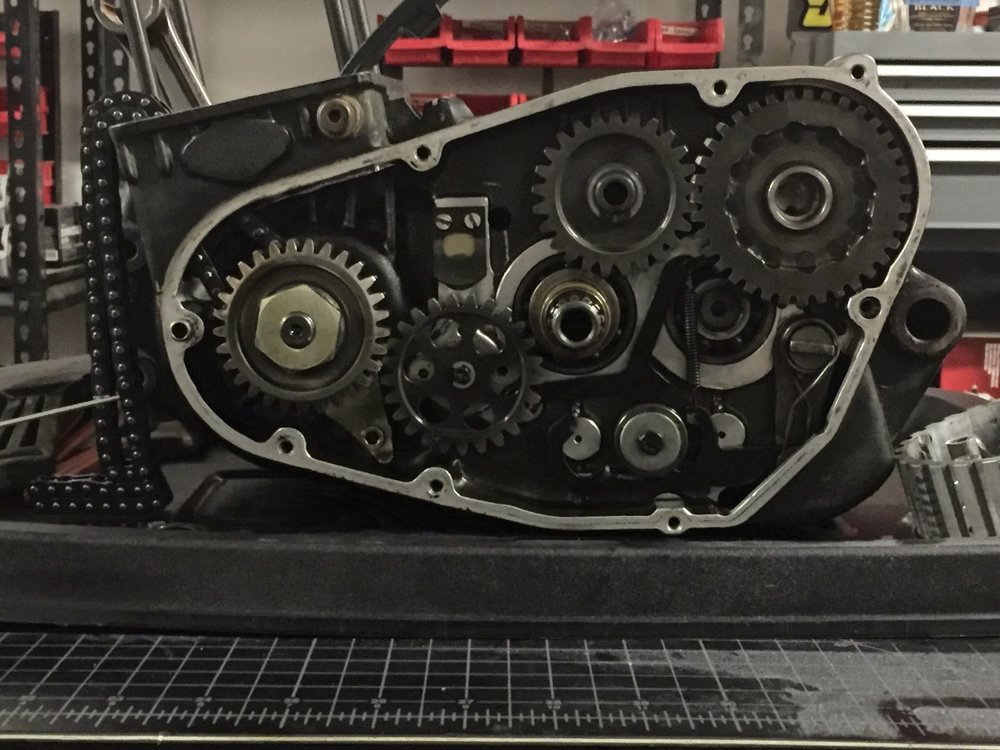
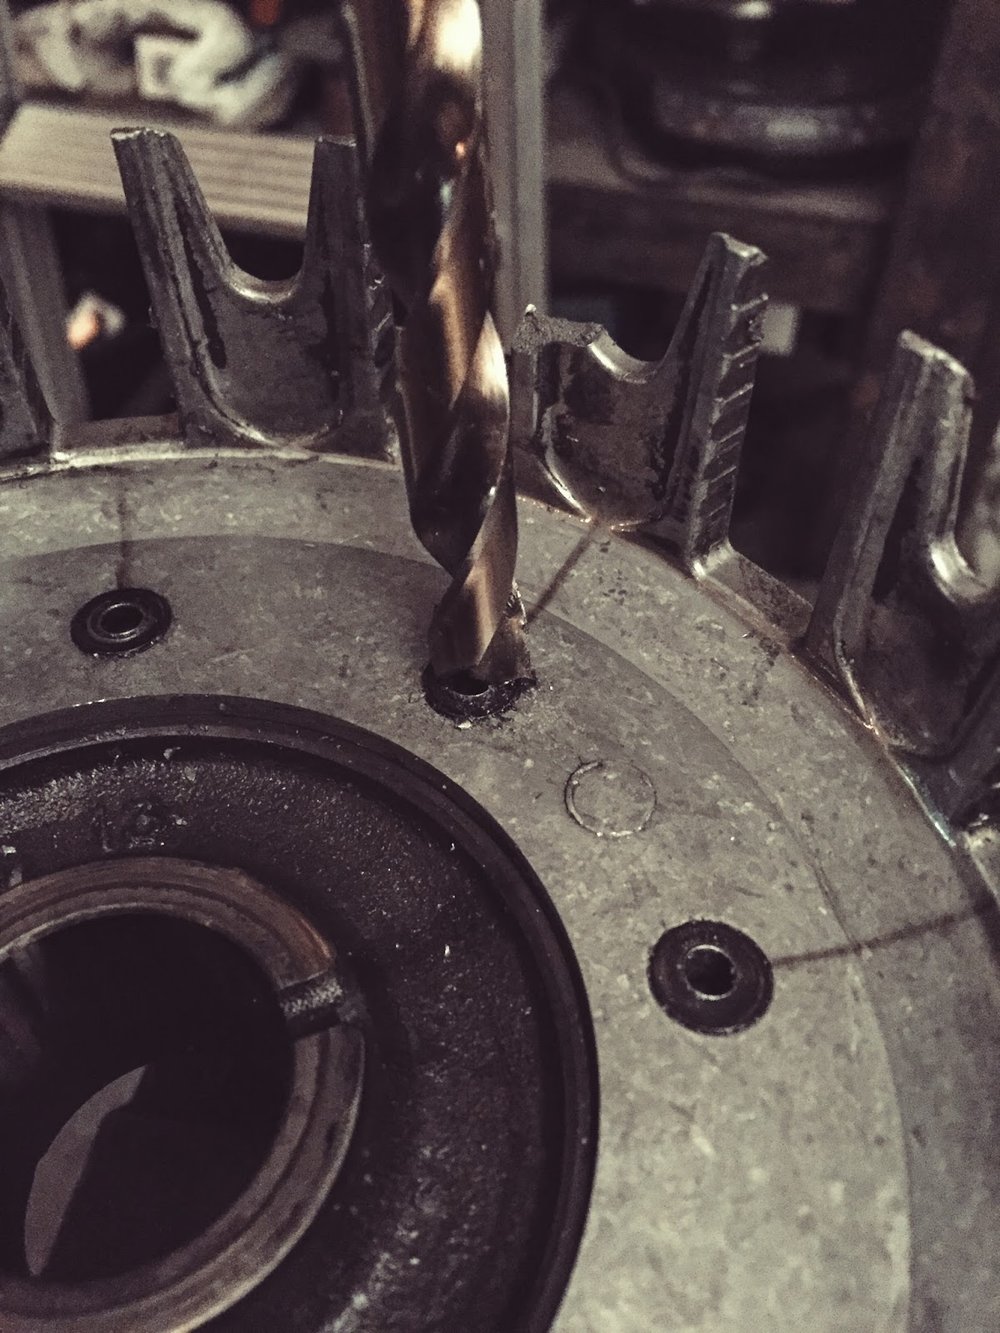
A quick how-to on removing and replacing your worn clutch basket. Baskets will usually get grooves worn into them over time from the plate tabs and eventually restrict movement, causing the clutch to drag. The Husqvarna was doing just that so a replacement basket was purchased.
Many baskets are riveted to the steel ring gear behind them. Here's how to remove the basket without damaging the gear.

Use a center punch to mark the center of each rivet then drill through with a small bit (1-2mm). Use some cutting paste to save your bits from all the drilling you're about to do. I use "Coolcut" from Walter.
This clutch has a sleeve bearing. Make sure not to touch the inner bearing surface. It'll likely have metal shavings on it and you don't want to scratch it. I put my gear under running water and then blew it out with compressed air after separating the 2. If yours has a ballbearing tape it off before drilling.

Step up to a 4-5mm bit and drill a slightly larger hole. Make sure your bit is narrower than the holes in the gear so you don't bore out the steel. (check out the grooves in the basket and the broken prong.)

Here's what it'll look like from the backside. What you've done is weakened the structural integrity of the rivets and given yourself a guide hole for the next step.
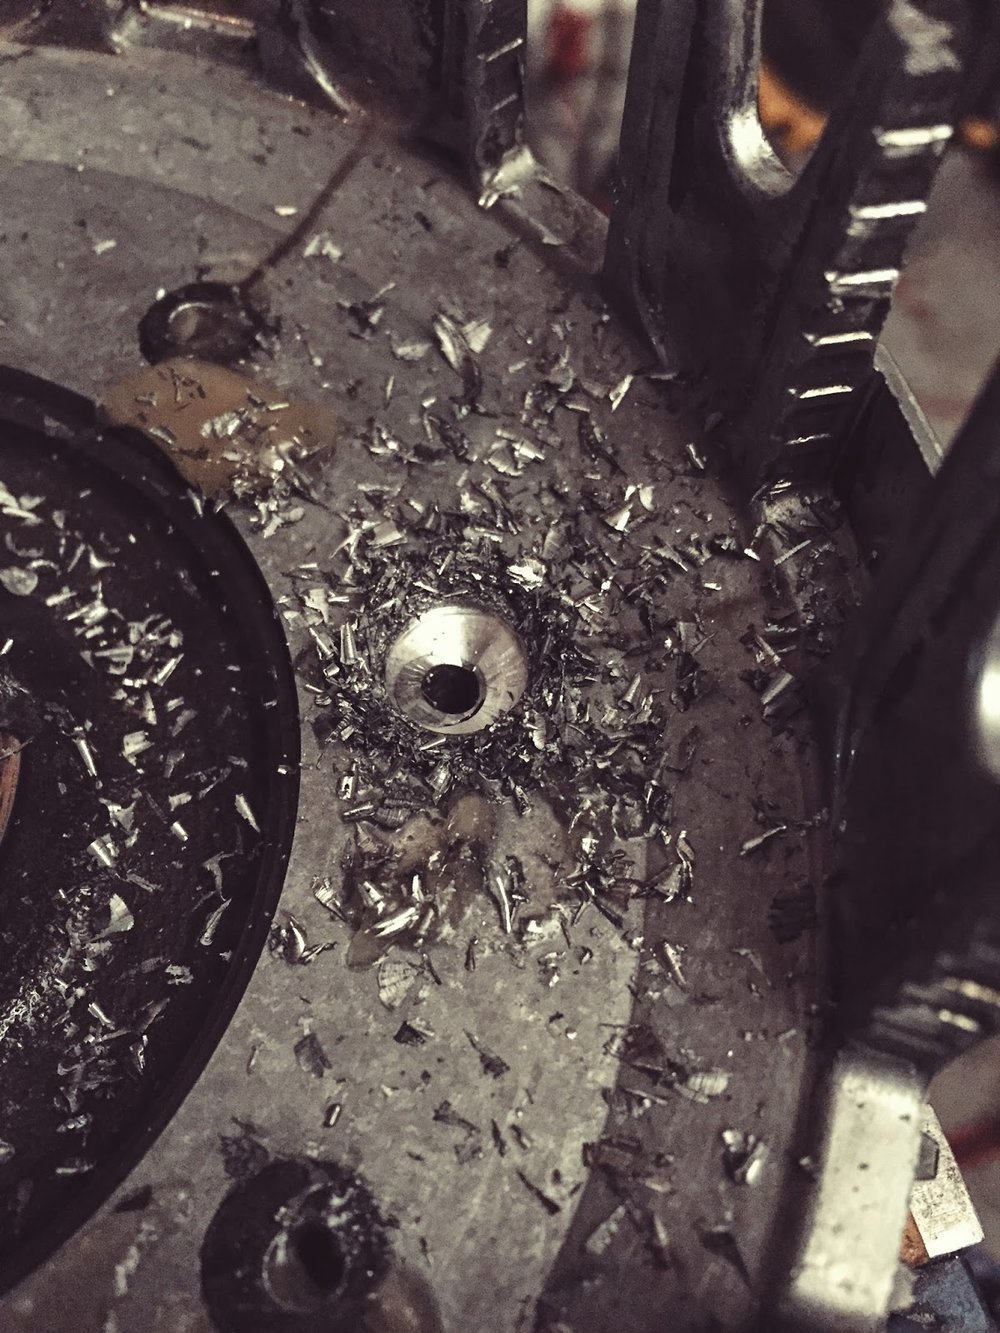
Drill down until you start hitting the aluminum of the basket. You can feel the different between the steel rivet and aluminum basket. What you need to do is drill away the rivet's head. Eating into the basket a bit is fine since it's trash.

Next find a punch that's larger than your pilot hole but smaller than the hole in the steel gear. Punch out the remaining rivet. It should pop right out with a few whacks. If not then you probably haven't drilled away the rivet head entirely.
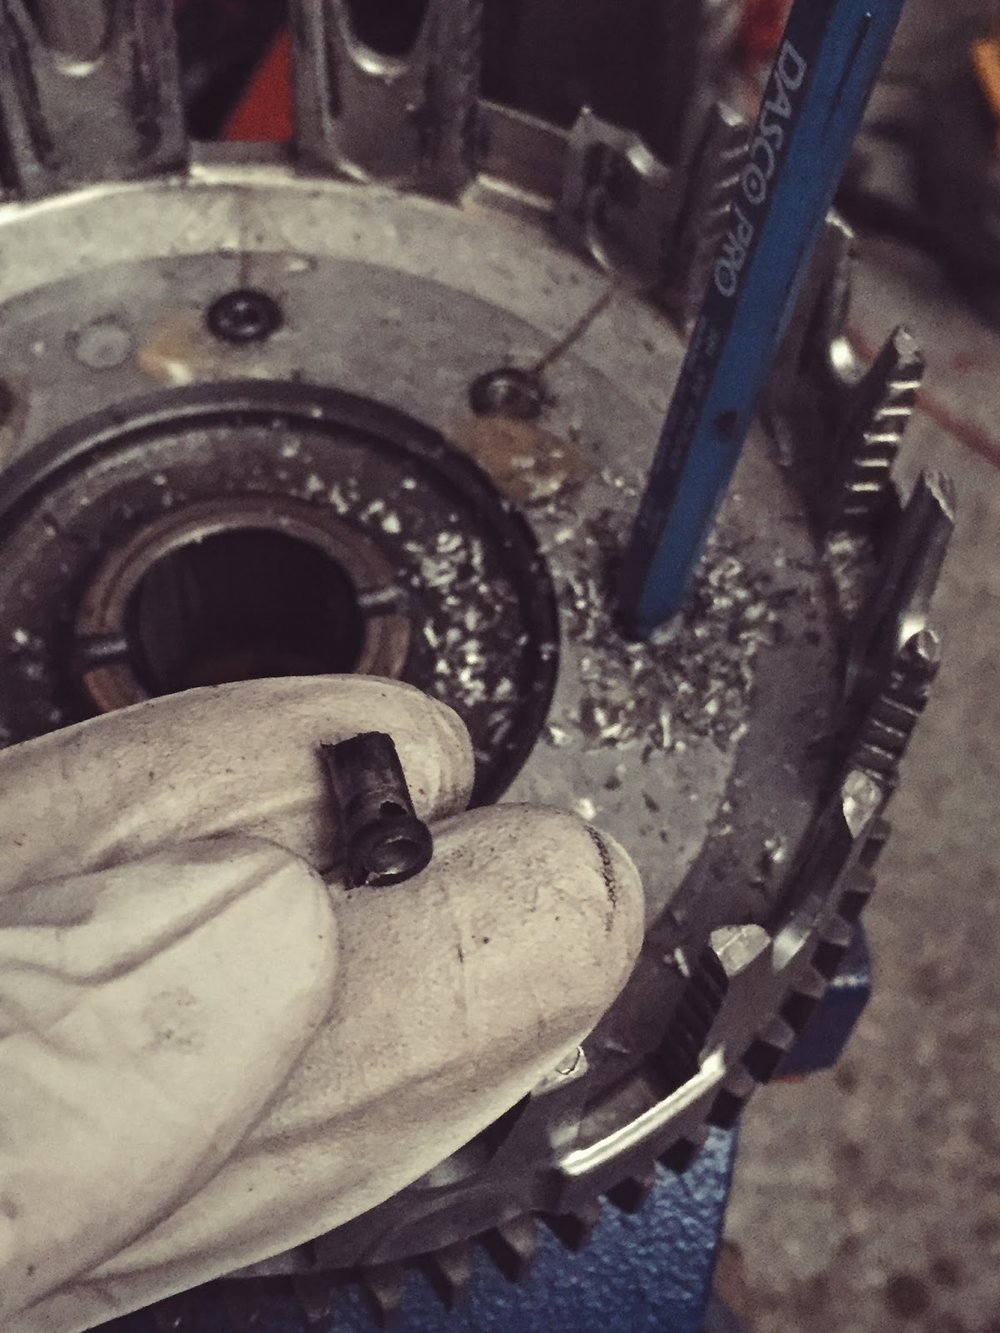


Many aftermarket clutch baskets are reattached with bolts instead of rivets. I scored this lightweight Surflex billet clutch basket off eBay. (One of the few company's that makes one for the TE) It came with steel rivets instead of bolts. To reapply the rivets you'll need a rivet hammer (pneumatic) and bucking bar. Here's a video on how to use a rivet hammer. Otherwise you'll need to find a shop that has one.
I happened to have everything from a previous project with Snap-on. The steel rivets require a higher PSI to squash. I had my gun setup at 120psi in order to get them to deform enough (1.5x the size of it's start diameter). Use several small c-clamps to hold the 2 pieces together while riveting so there's no play in the fitment. Sorry, I installed the new basket on a different day and forgot to take photos.
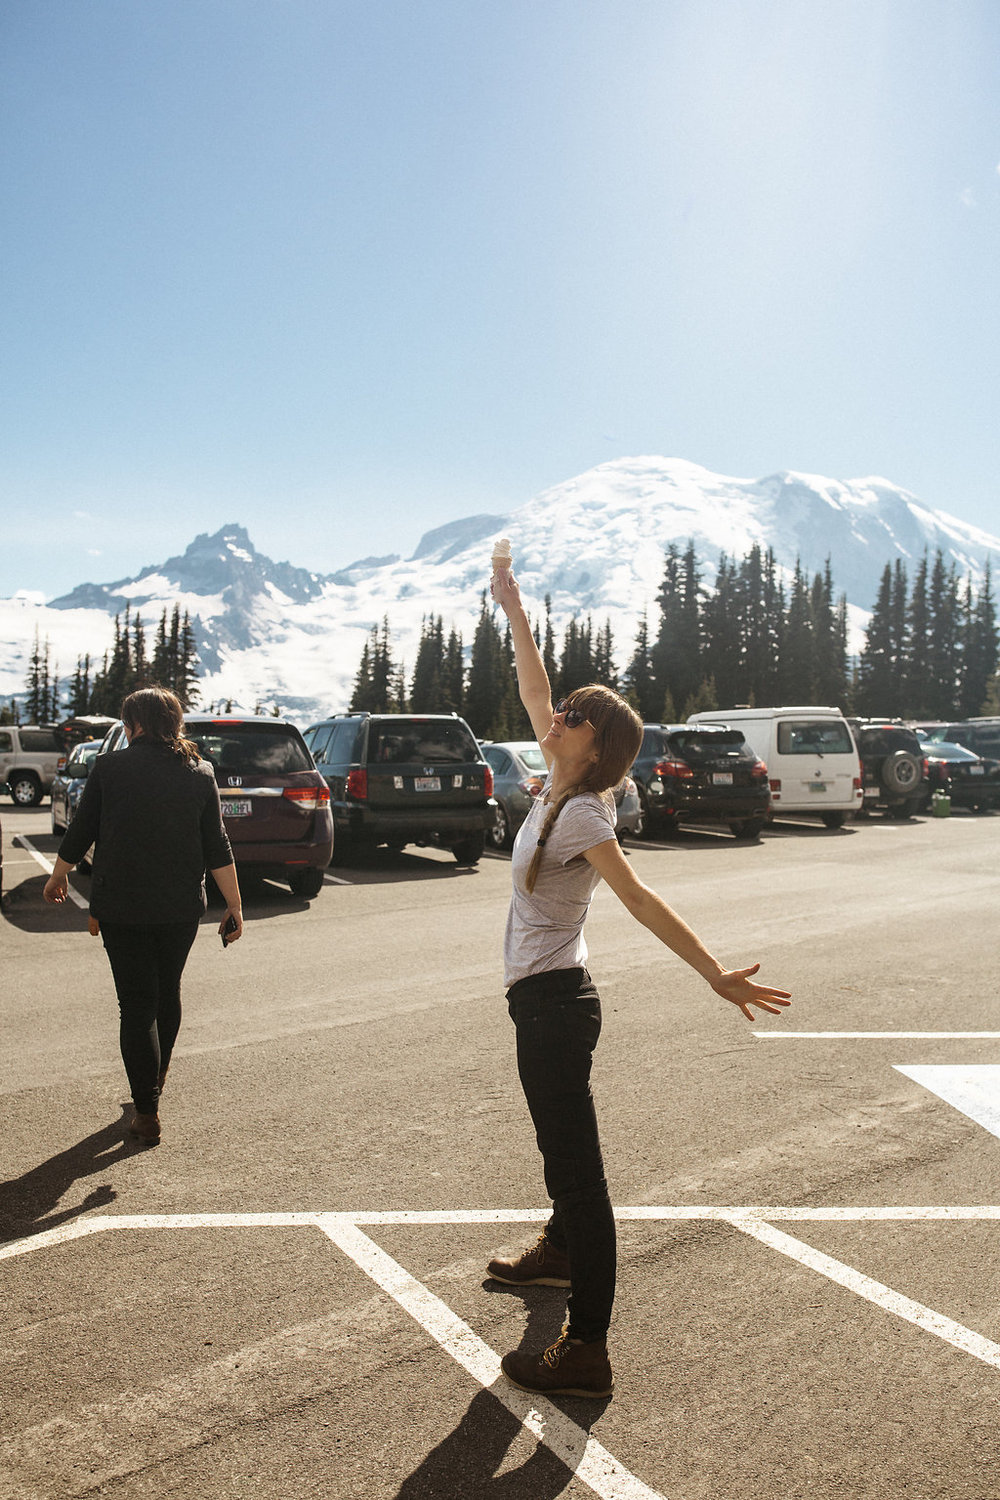
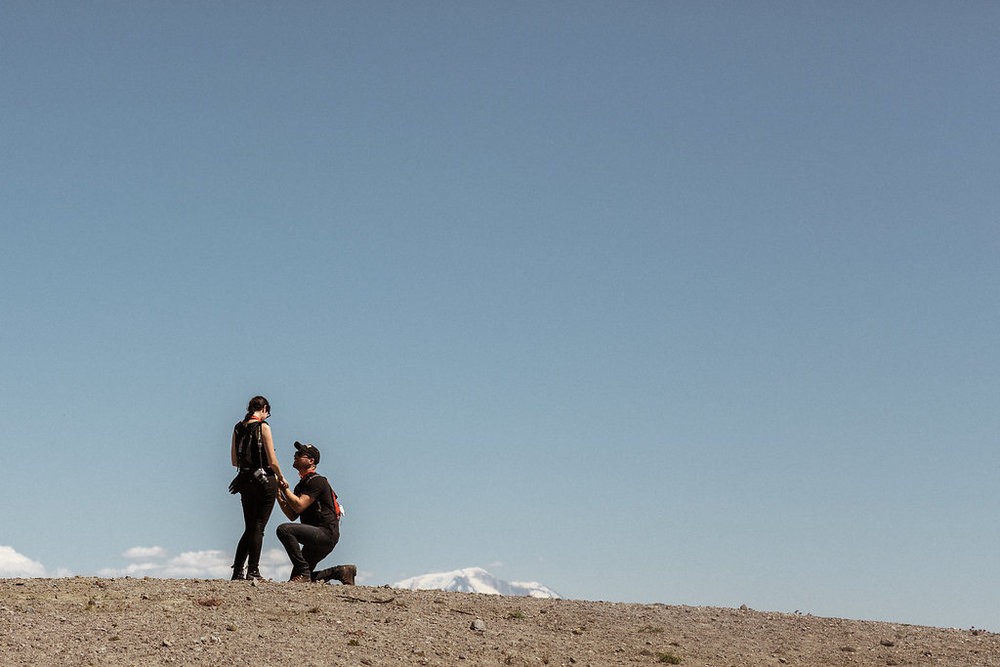
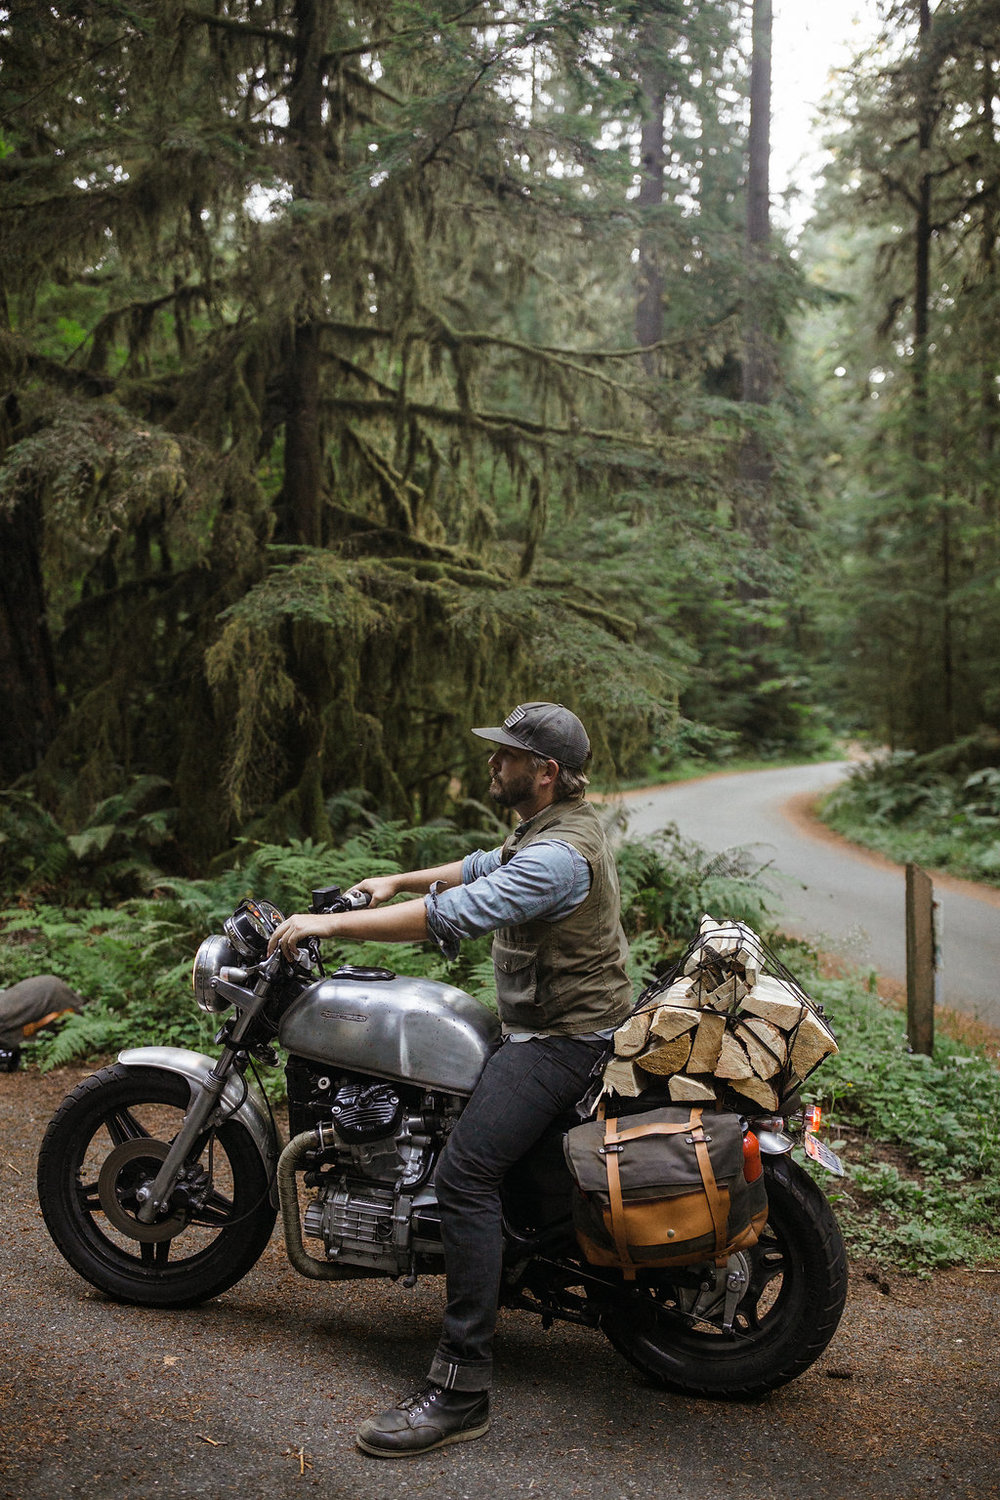
As a pre-requisite for our move out to Portland in November we decided to load up the bikes and explore the Pacific North West with some good friends. The 4 of us who came from Milwaukee trailered the bikes to Missoula, MT where we shed the truck. Out west we met up with Erik from Cincinnati, and Seattleites Mike and Jenny of Pack Animal. Our goal was to ride the PNW heavy hitters Rainier, Hood, and St. Helens with the girls spending the weekend at the Dreamroll on Mt. Adams. We were on the bikes for 6 days, bathing in glacial rivers, camping in furry forests, getting engaged, getting flat tires, low siding and hot springing. I'll let Jenny's lens tell the rest of the story and follow this post up with a Dreamroll recap. An all girls moto camp out deserves it's own real estate.


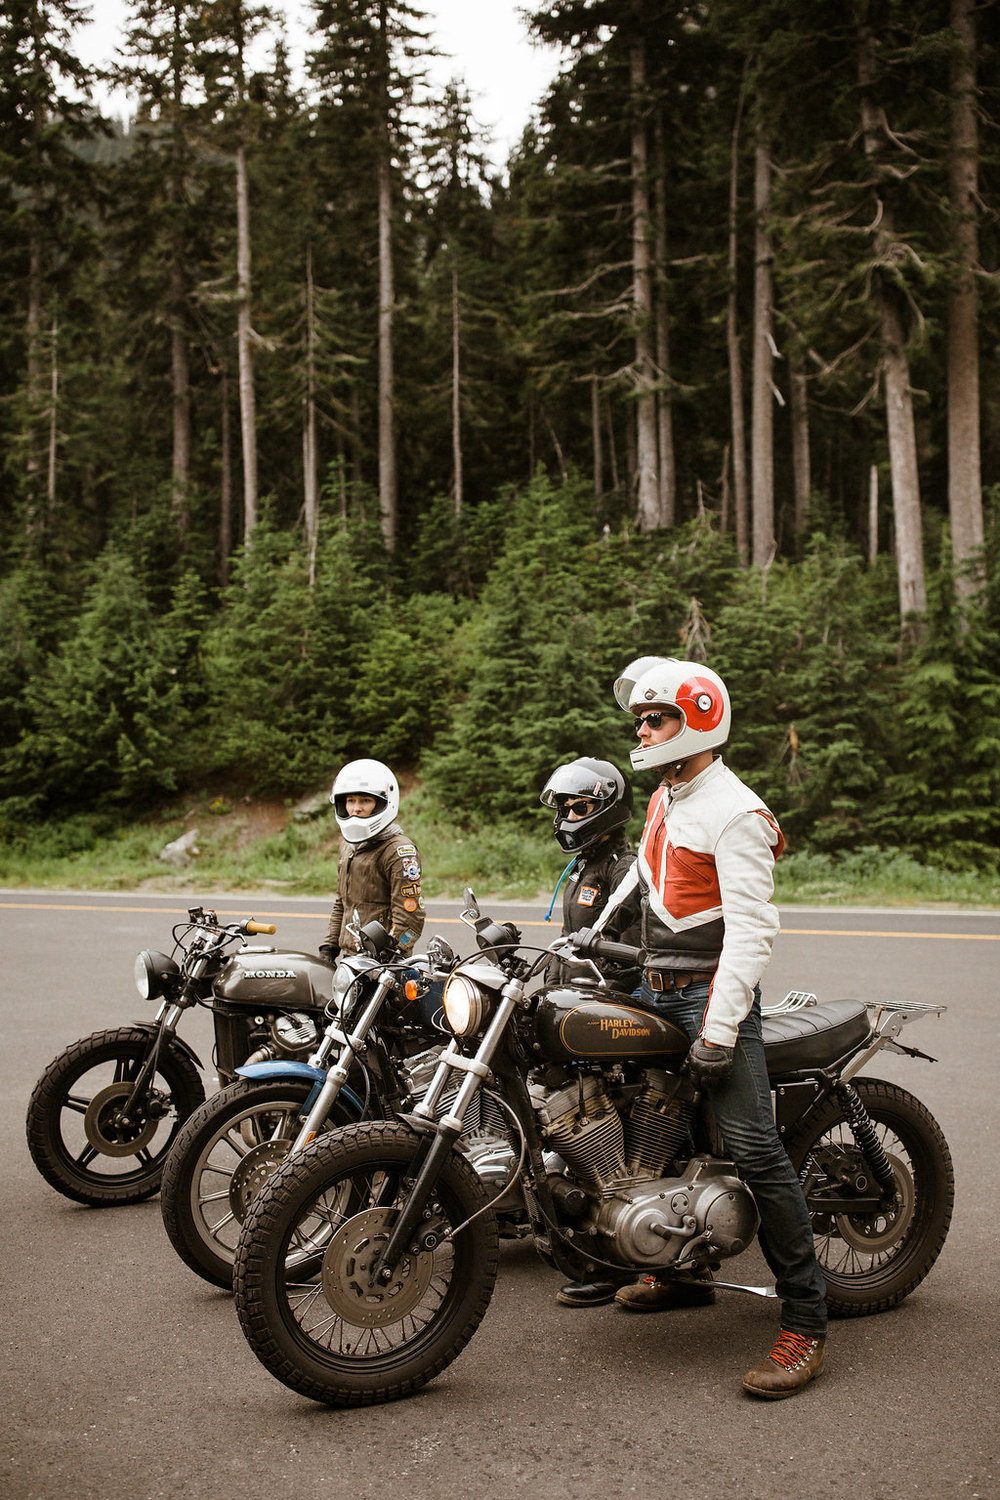


The week prior I was wrestling with the Husqy's intense vibration rattling everything to pieces, along with a very stubborn dragging clutch. I was barely able to get the bike rideable before the trip. My first attempt at making a luggage rack out of aluminum resulted in the welds cracking within the first 5 minutes. See, the TE570 was Husqvarna's bare bones, no frills platform. No key, no starter, no battery, steering lock, horn, or gauges. And unlike it's stablemates the TE400 and TE610... no counter balancer on the crank shaft. It's like straddling an oversized palm sander designed to polish out your genitals until you're smooth as a Ken doll. The trade off is it's a 260lb 56hp wheelie machine with an on/off switch for a throttle. In an attempt to sort out the clutch I swapped oil weights 3 times and replaced both the discs and the plates before I just ran out of time. It wanting to constantly lurch forward made red lights a real treat. Consequently I got pretty good at kicking it over first try in traffic. After swapping in a new rear sprocket in a Missoula TJ Maxx parking lot she was as ready as she was going to get. Over the next 2,000 miles I'd rattle the guts out of the PIAA lights and stuff the radiator 4 or 5 times but all in all it was a great shakedown run. Now it's time to make the final adjustments, tear it all down and send everything out for paint, powder and plating.


 |
| Just some glorious Pack Animal stacks. |


Have a general idea of what you want to do. Admittedly the below sketch is too thin for comfort so I'll be beefing it up some.
Make a seat pan. You can use aluminum, stainless steel or mild steel. If you use mild you'll need to powdercoat it (like I did). 16G is a good steel thickness. You may want to use a 14G for aluminum. Do not paint it. Most professional upholstery glues will eat through paint.
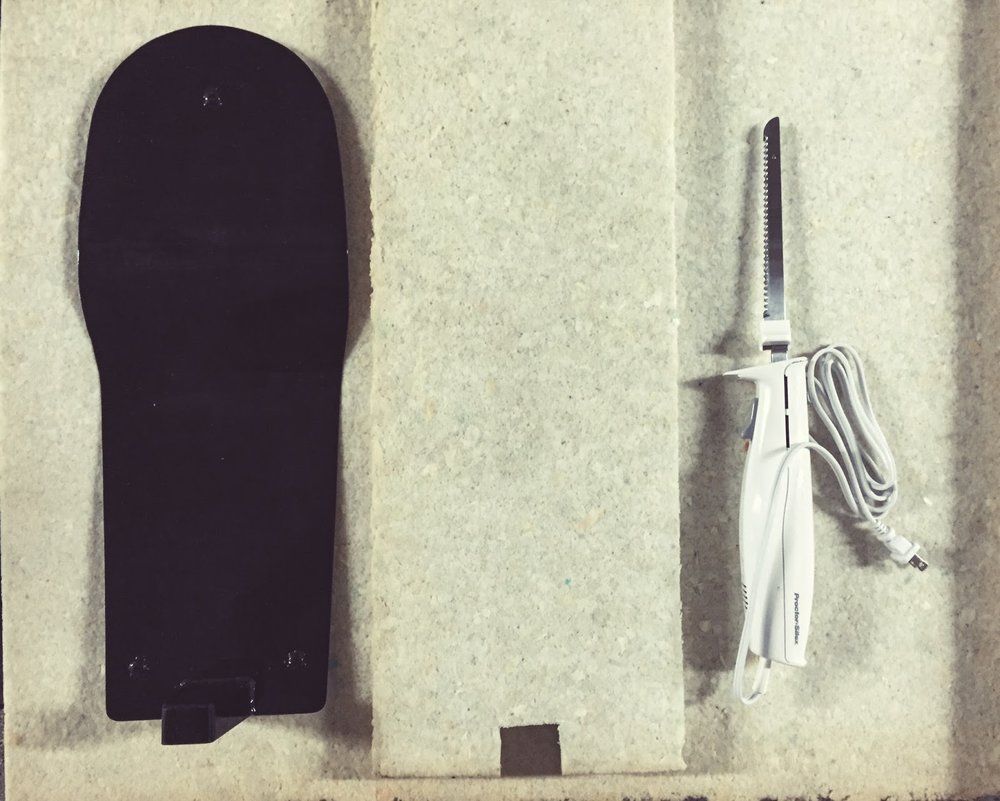
Go to your local upholsterer and test out some seat foam densities. Buy a roll of it (around $75 for 6'). Also pick up an electric carving knife. Get a nice one. The one shown here was only $20 and it burnt out within the first 10 min. You're going to put a lot of load on the motor cutting through dense foam.
Cut out a rough shape, leaving some overlap off the edge of the pan. Use a spray adhesive to attach the foam to the seat pan.

Layer up the foam as thick as you want, using the spray adhesive to bond them together. I went with 2 slabs of 1.5" foam. After you get your cake layered use the carving knife to trace the shape of the pan, cutting off the excess.


Put the stack up on the bike and test the comfort. Remember you'll be taking material off so if you're on the fence about it's comfort now definitely add more foam. You shouldn't be able to feel the seat pan if you bounce up and down on it. Depending on the kind of seat you're after this is also a good time to grab a Sharpie and mark where you land on the foam. You can use these marks later to draw out contour lines to follow when you start carving.


Measure and draw in your guidelines with the Sharpie. Try to get your lines as symmetrical as possible before carving. Going at it freehand will likely cause you to take off more material than desired as you go from side to side trying to get them even.
*Note - mines's looking a little chunkier than desired since my knife died on me halfway through. I ended up buying a new one and smoothing it out further from here. You can also use a vertical belt sander to smooth it out.
Make sure you keep testing it throughout the process to assure you're not taking too much off.

If you want crisp edges keep them sharp in the foam. When the upholstery is stretched over the form it will round them off quite a bit. For the upholsterer you can either draw up a stitching diagram of the seat or draw out your stitch lines right on the foam. Head over there, pick out some materials and throw your money down.
Vinyls are much more water resistant than leathers and look identical. Downside being the leathers wear in nicer and can be conditioned. Vinyls can be prone to creasing and cracking over time. The CX500 seat is vinyl. It's been on there for about 6 years now and just started cracking this summer. I probably put a couple thousand miles on it a season.
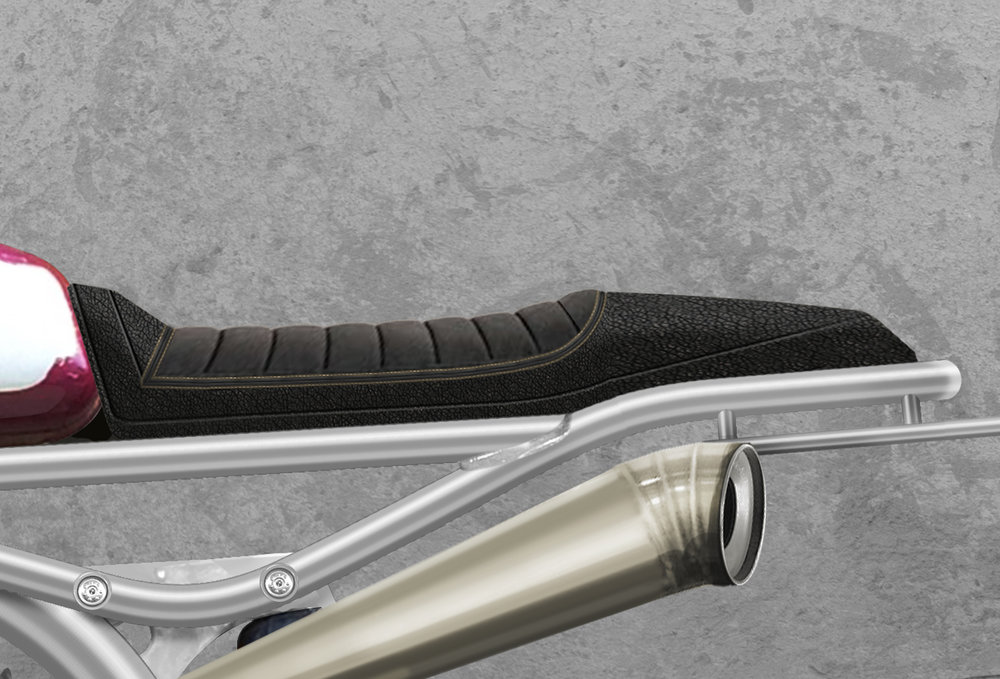
Here's how the Husqvarna seat turned out. Black alcantara on black vinyl with a champagne stitch. If you're looking for a tuck and roll the upholsterer will lay down a 1/4"-1/2" layer of low density foam on top to give it the depth. Below is 1/4". Go for the 1/2" if you want it deep enough to hide the stitch. Vinyls will give more definition than leathers due to their stretch.

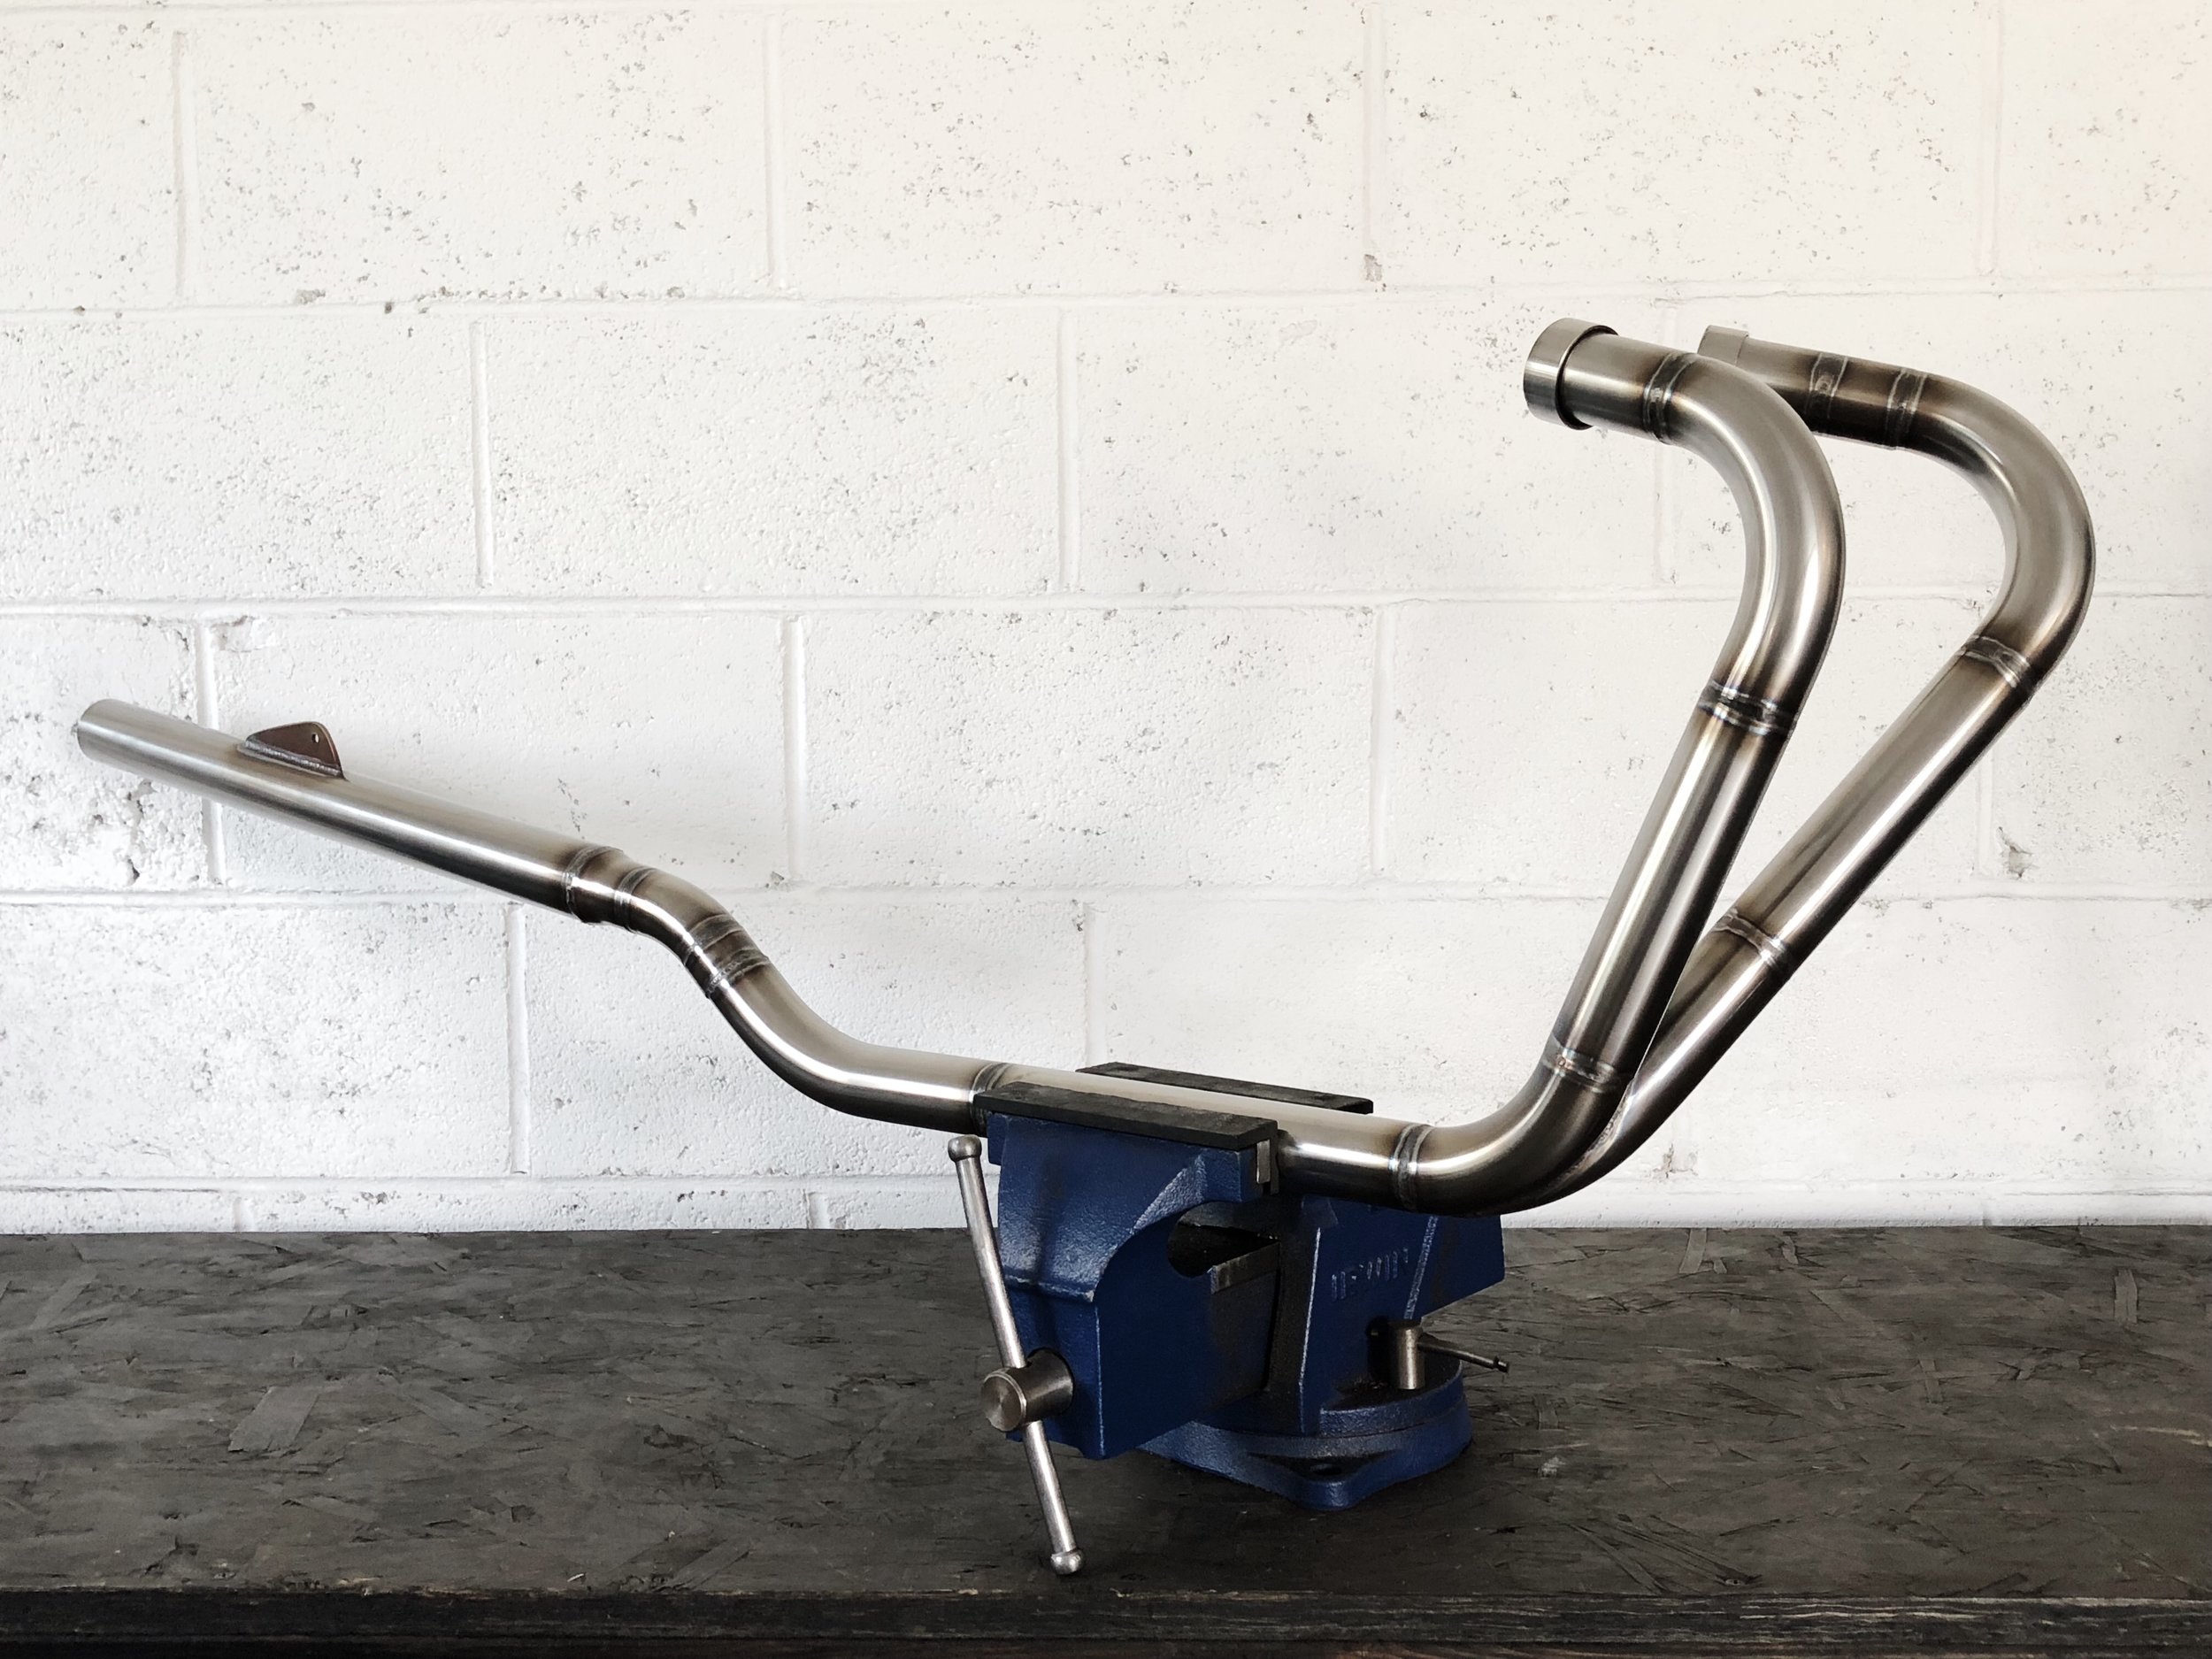
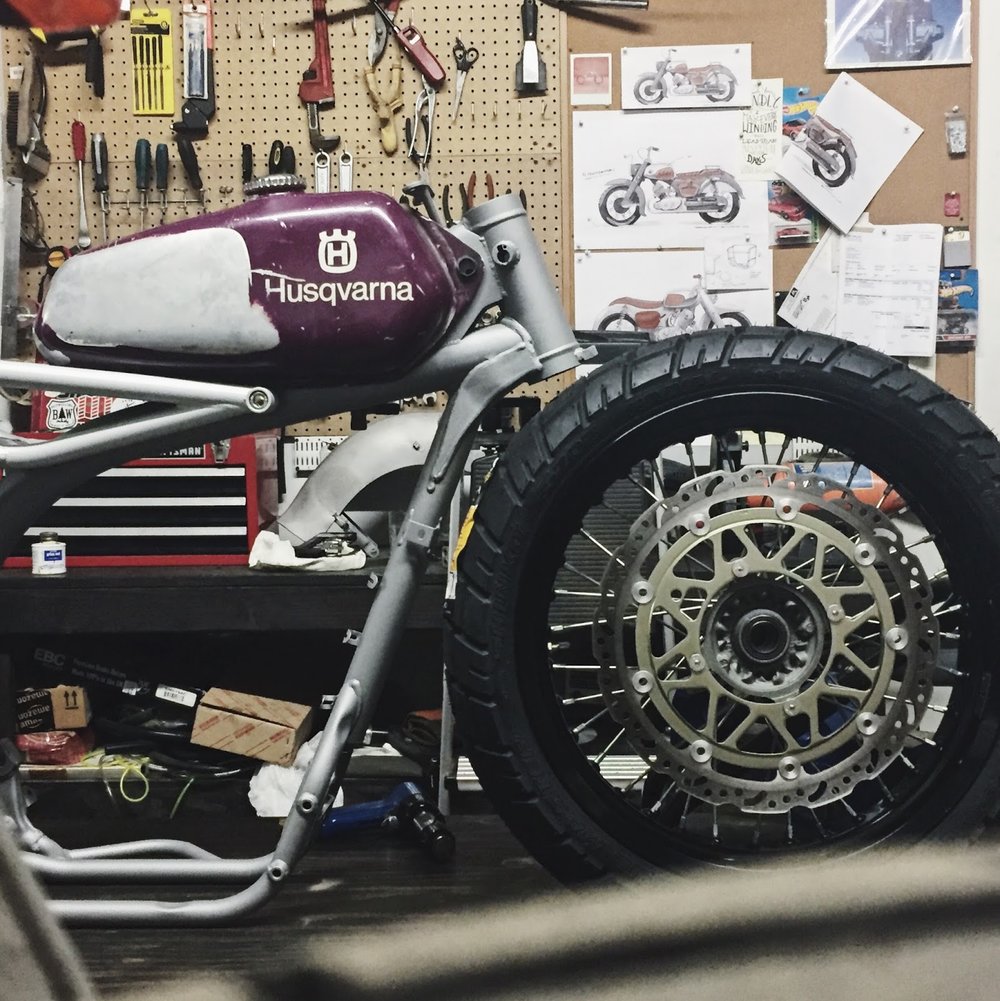
Stainless exhaust is done minus a rear mount. Waiting on some material to wrap that up.


Fuel valve relocation on the tank was necessary due to clearance issues and the new tank angle.

Made a 30 degree carb mount to bypass the backbone and fit this massive K&N filter. It tucks in close enough that it shouldn't interfere with your leg.


Custom Motorcycles & Design, Portland OR.

portland customs tee - $19.95