

PROJECT SR250: Mocking Up The Seat
/
Handing a part of your build off to someone else can be a nail biting experience, leaving you up at night with the cold sweats, rocking back and forth in my empty bathtub. Setting up your go-to guy with as many visuals as possible is a good way to make sure your intentions are executed correctly and sleep is achieved.
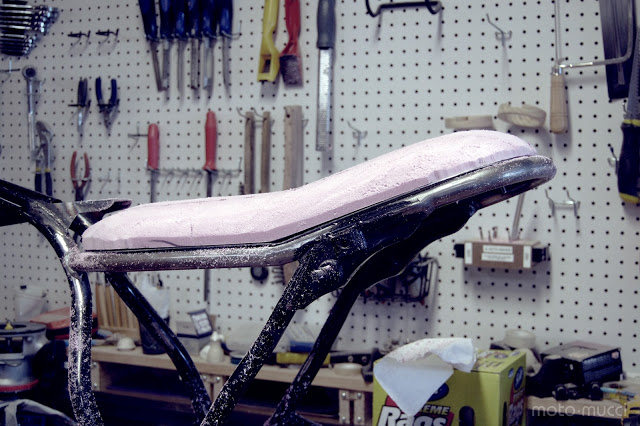
I'm no good with a sewing machine, so I leave the upholstery to the professionals. I recently finished up the seat frame and seat pan for the SR250 and the next step was to shoot the pan out to the upholsterer. The seat is a crucial part in any build. Fitment, proportion and comfort are paramount. I set out to work through the details of the SR's seat in pink foam first. This way the upholsterer had a physical mock up he could reference when it came time to shape the real stuff.
The tools you'll need:
- Pink (Panther) insulation foam - (Home Depot / Lowes / Menards)
- 3M Super 77 spray adhesive
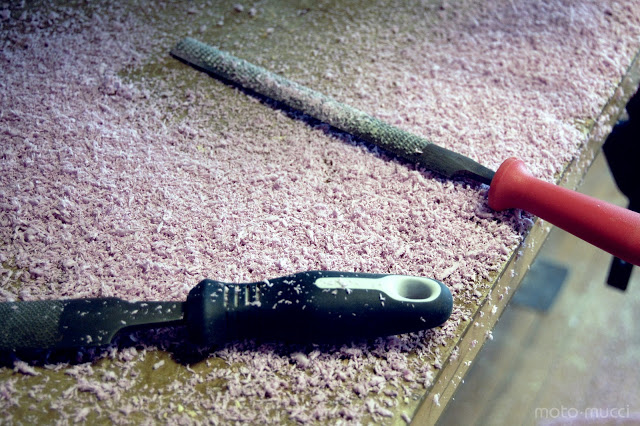
- A couple different grit rasps.
- Bow or Band saw
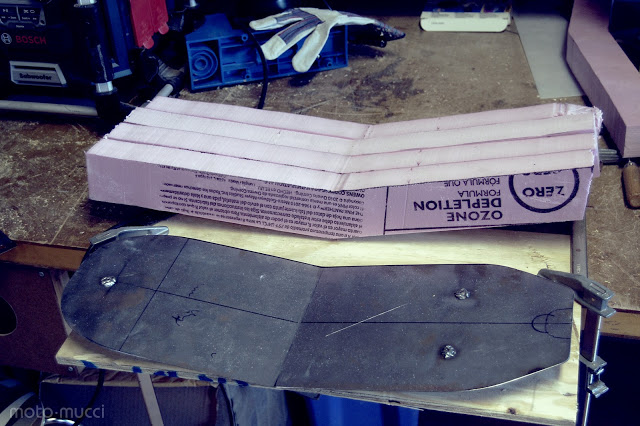
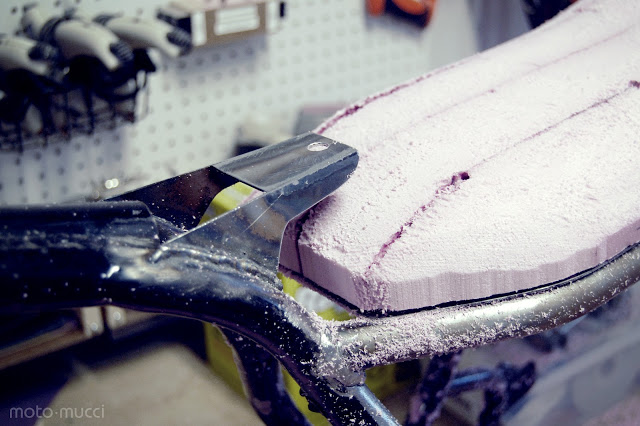
Cut out strips or blocks of the pink foam to fit your seat pan. Cut the strips thicker then you need so you have some extra material to play with. You can always shave it down. Use the spray adhesive to bond the pieces together.
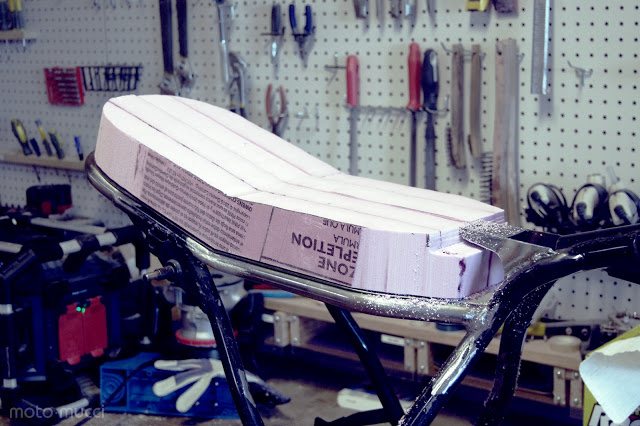
Trace the pan and cut out a rough shape with your saw.
Start by rounding out the edges. Get one side roughed out then flip the frame to match the other side.
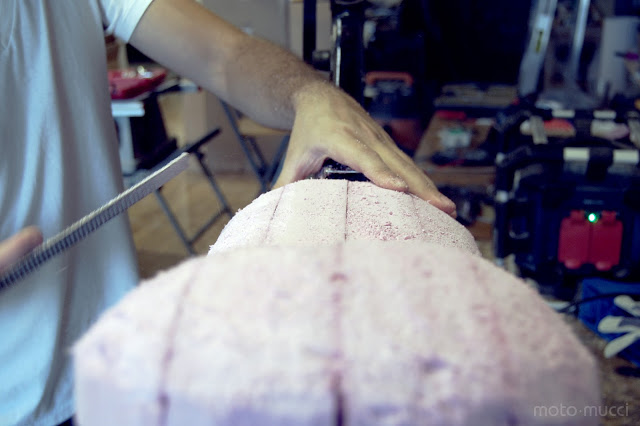
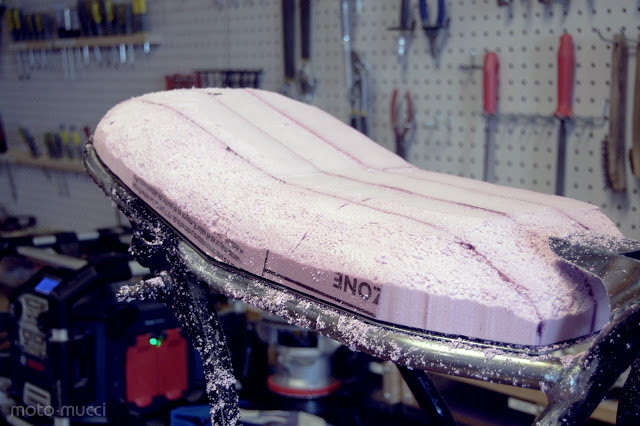
I started out with a 2.5" foam thickness. After I roughed it all out I deemed it to be too fat looking and took another 1/4" off. By tapering the design towards the edges it gives the appearance of being much slimmer. This will allow you to have a sleek looking design yet a comfortable amount of padding in the center. This technique is used a lot in the design world to make products look a lot thinner then they really are. (The Macbook Air does this very well)
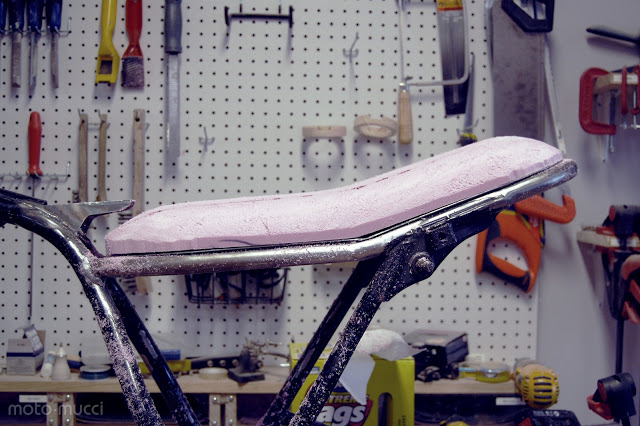
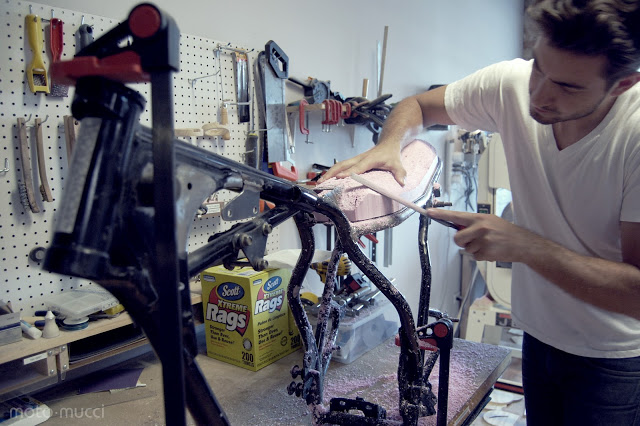
After a few refinements I got the seat to a shape I was happy with. Now I can bring this over to the upholsterer along with the seat pan and show him exactly what I want it to look like, instead of trying to explain it with words. Words can be hard. Physical representations of what you want leave out the guesswork and interpretations.
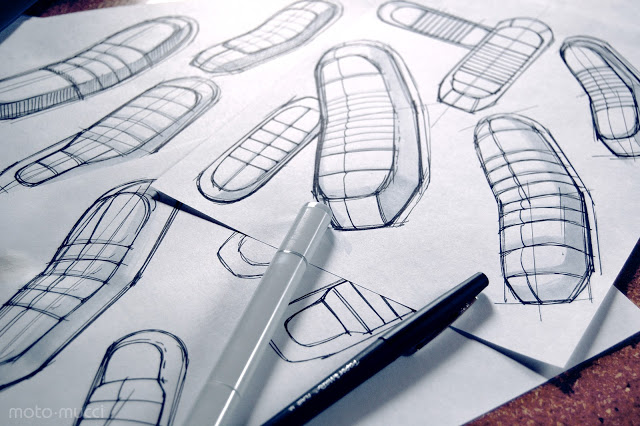
The shape isn't all that's important in a seat however. Next I worked through some stitch and tuck patterns. I'll bring a dimensioned stitch pattern along with me that I'll also hand off. All that's left now is selecting a color. You'll have to hold out to see that one...
Update:
Update:


